
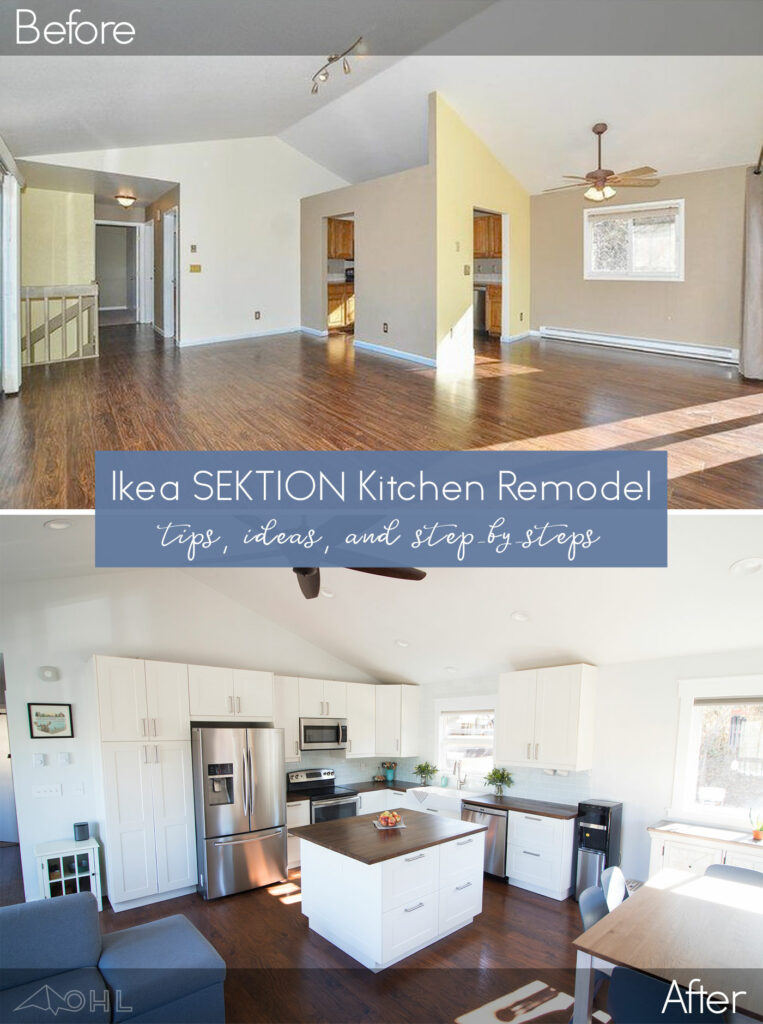
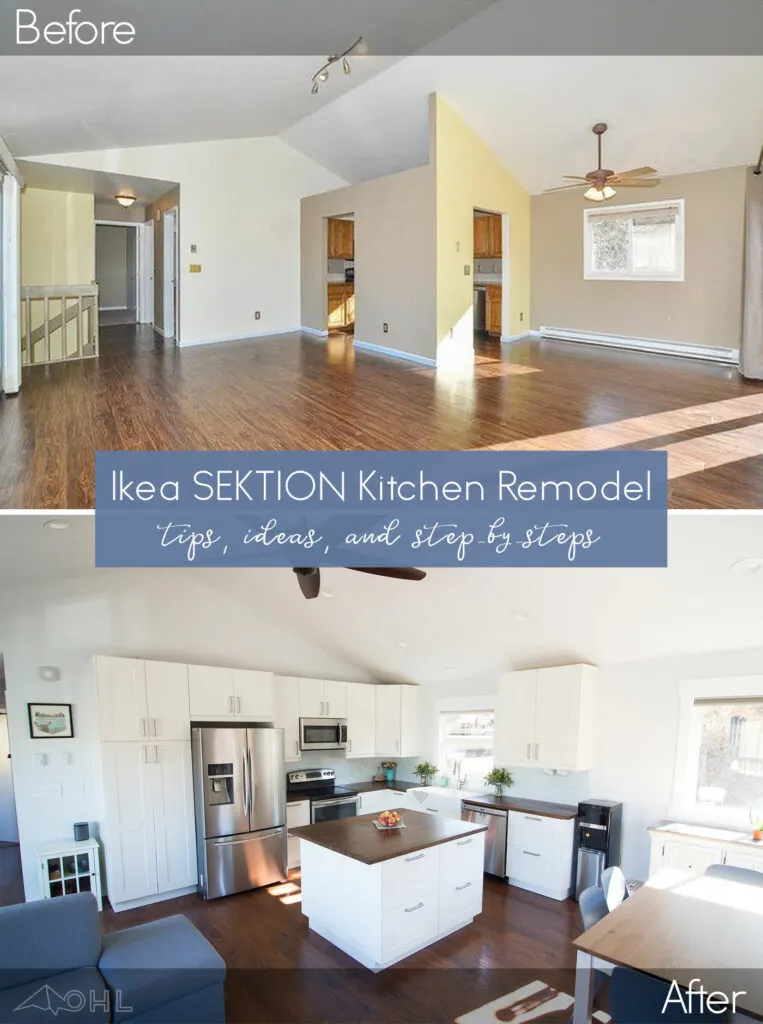
Oh, where do I begin. This kitchen was months in the making, and so many things just fell perfectly into place for this to happen, but we also had our fair share of mishaps and roadblocks.
Visit an Ikea Kitchen Showroom
We live about 1.5 hours from an Ikea store so while the kids were in school one day, we headed down there to peruse the kitchen department and get a feel for what we wanted so we would be prepared when the time came. This turned out to be an extremely important part of the process, since a kitchen on the computer screen can look and feel completely different in person.
I was all set on the gray BODBYN door fronts, I loved the idea of gray cabinets. But when we saw them in person, it was immediately clear that it was the wrong choice for us. My second choice was the off-white GRIMSLÖV doors and when I saw them at the store, I knew right away it’s what I wanted. So I really can’t stress enough the importance of actually getting in the store and looking at the kitchens and materials in real-life.
The best part is that the door/drawer fronts, handles, and countertop samples are all movable in the showroom, so you can bring the countertop and handle to the door front of your choice to see exactly how they will look together.
Looking through the showroom and getting to open and close the cabinets, getting a feel for how things worked and fit together really helped me figure out how I needed to place things in my own kitchen. They have so many configuration examples that I would have never thought of on my own. For example:
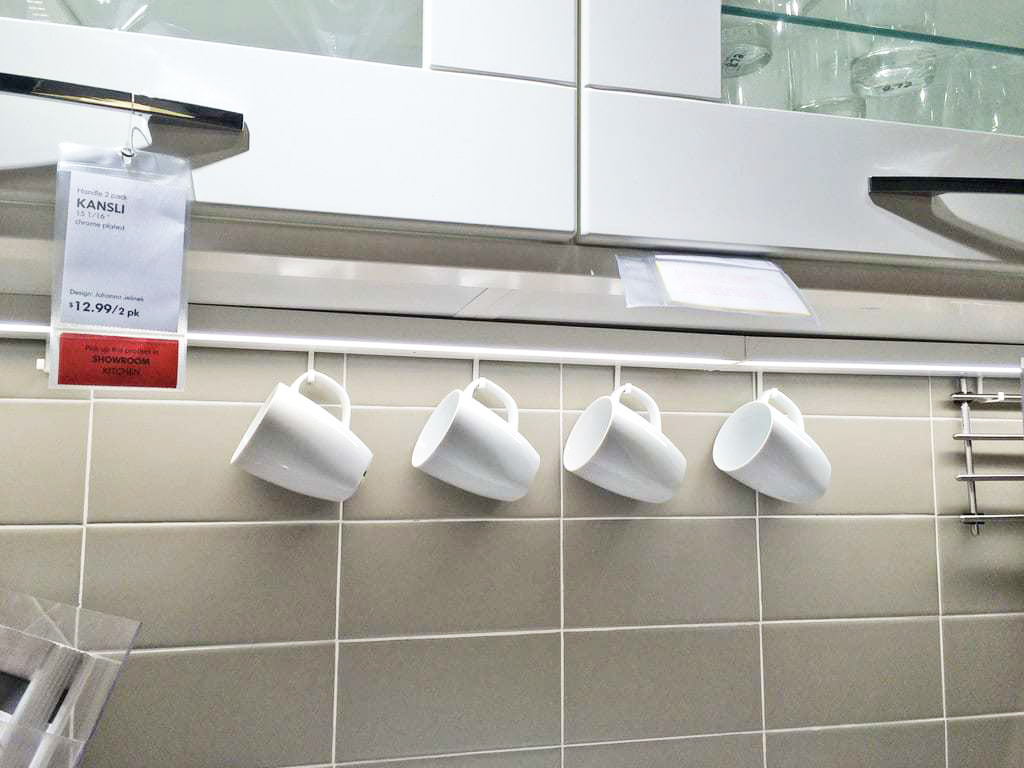


Built-in under-cabinet lights with attached hooks for mugs, utensils, pot holders, etc. I knew I wanted the lights, but the included hooks was just a great space-saving bonus.
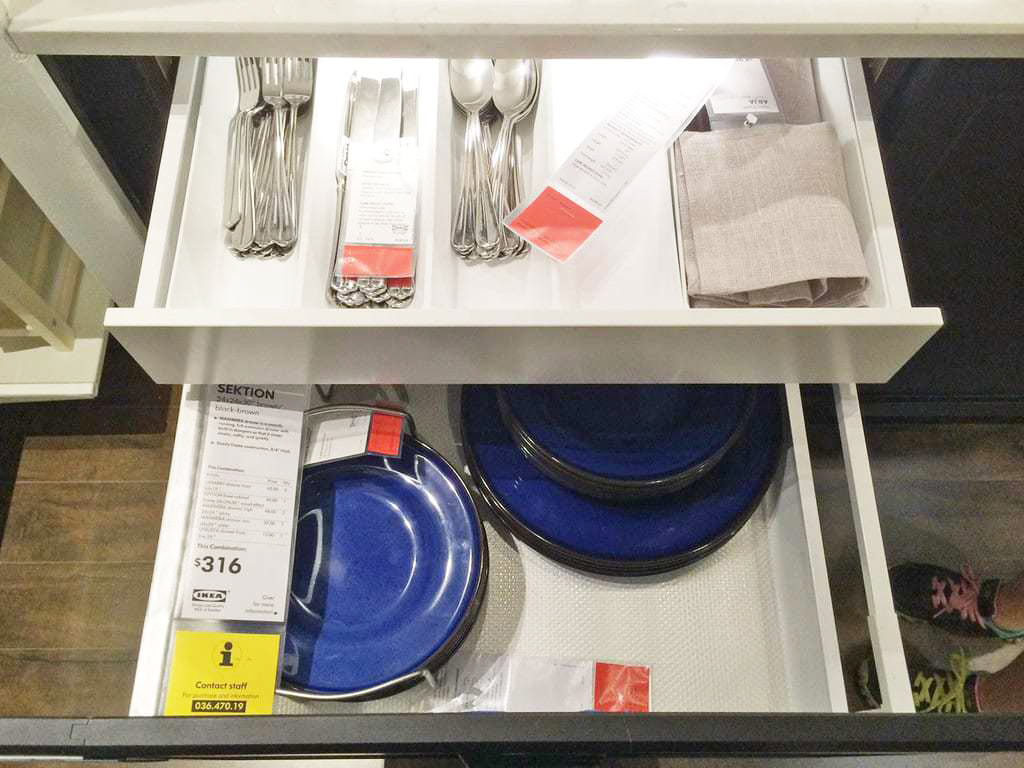
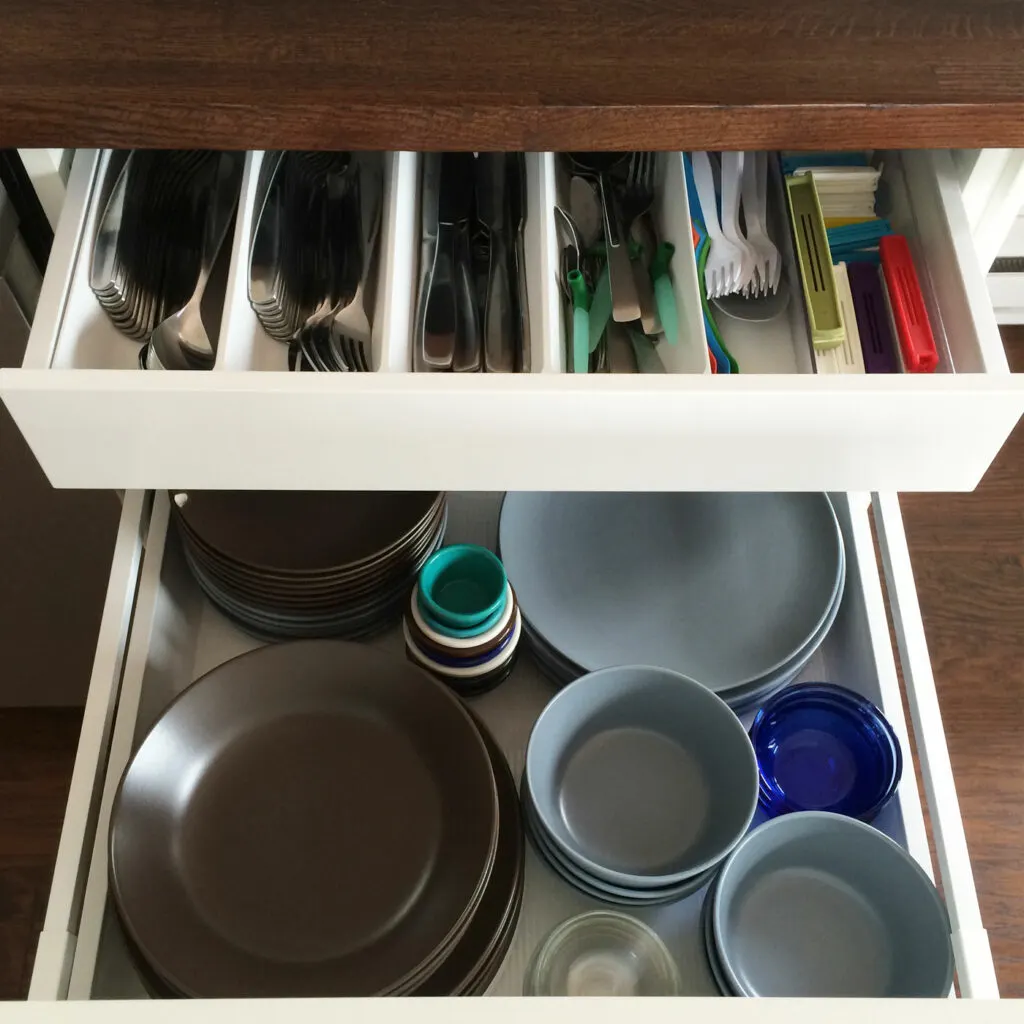
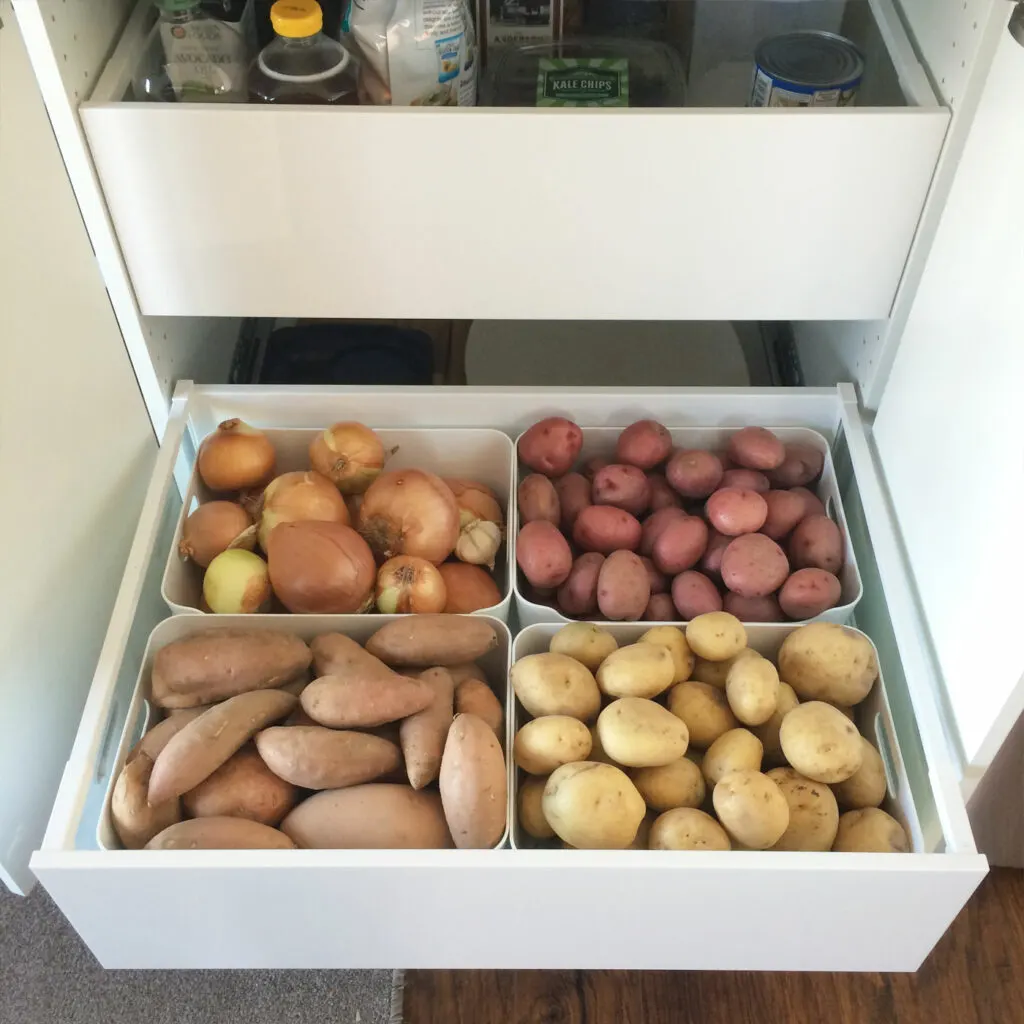
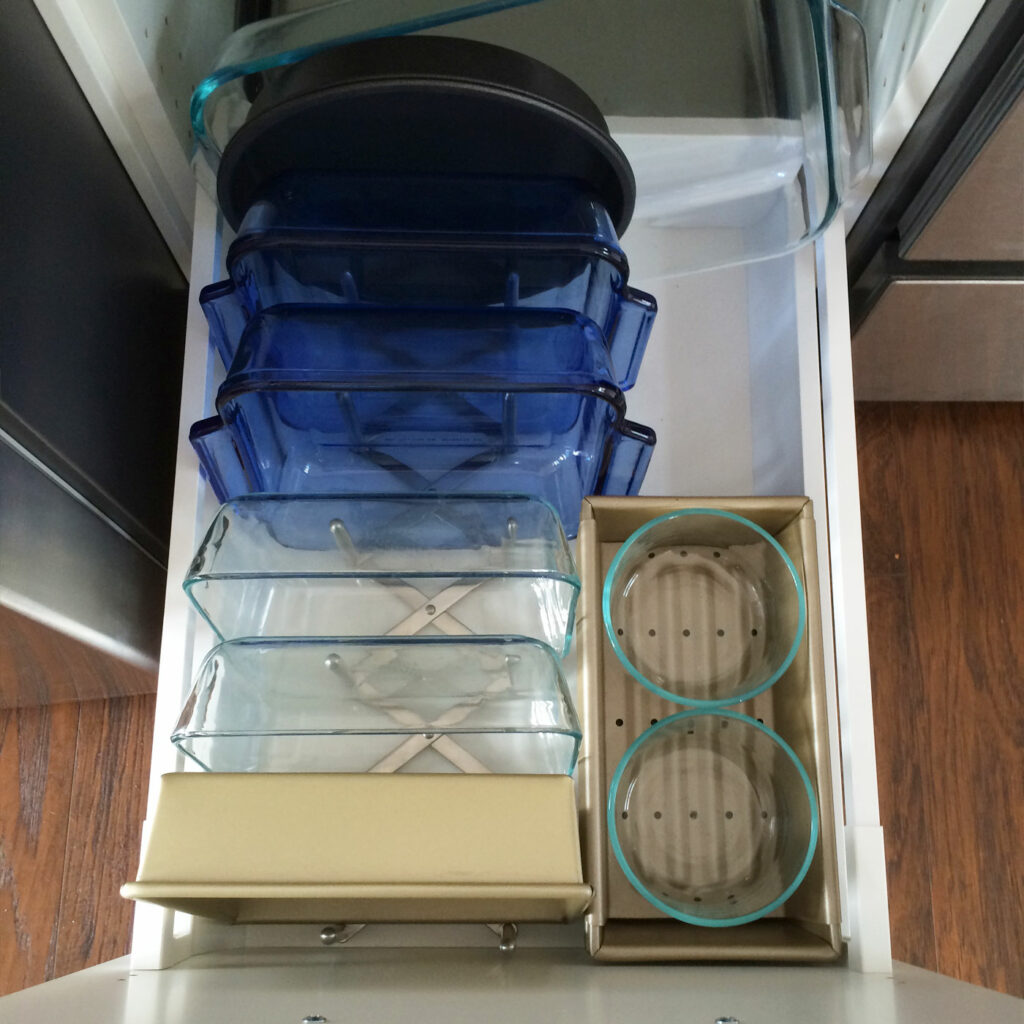
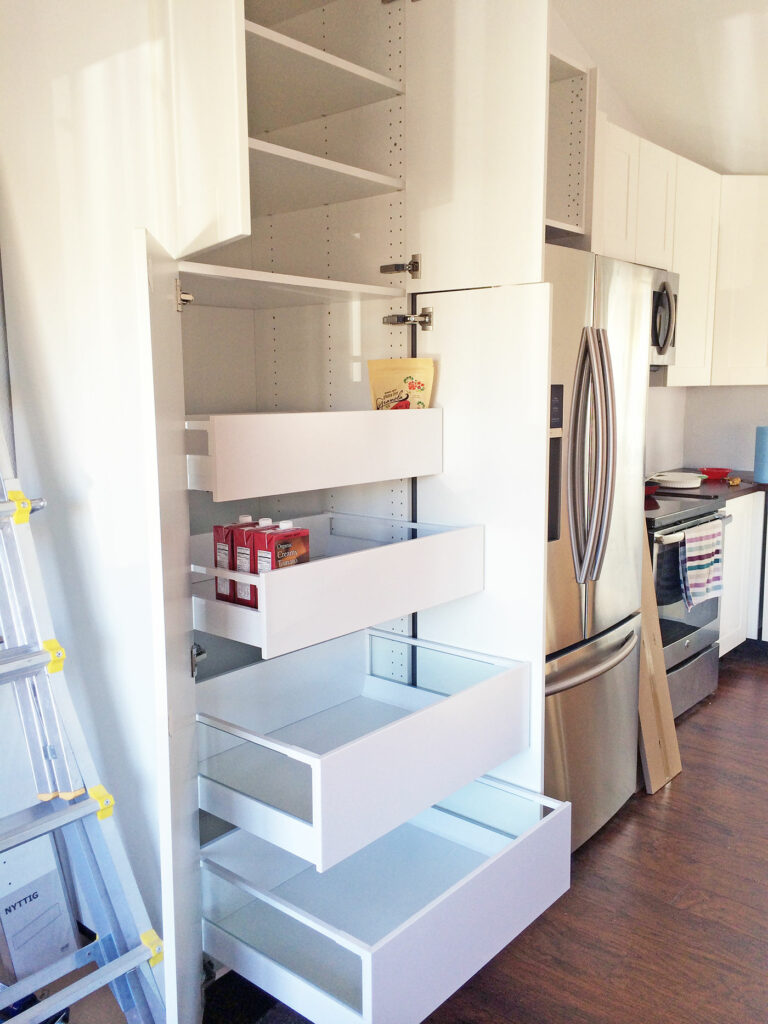
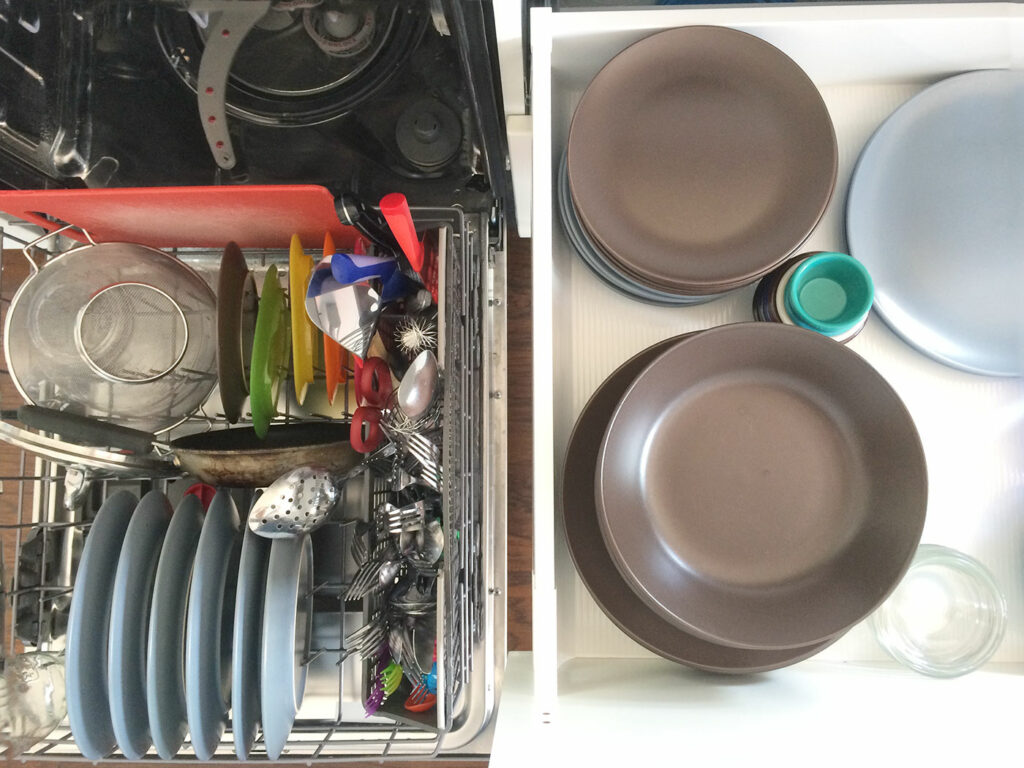
Ikea is known for making the most of small spaces, and their kitchen cabinets are no exception. I was set on drawers rather than doors for the lower cabinets, and Ikea has maximized that space with drawers inside the drawers (drawer-ception?) Having the plates and bowls in the same drawer as the silverware? Perfect.
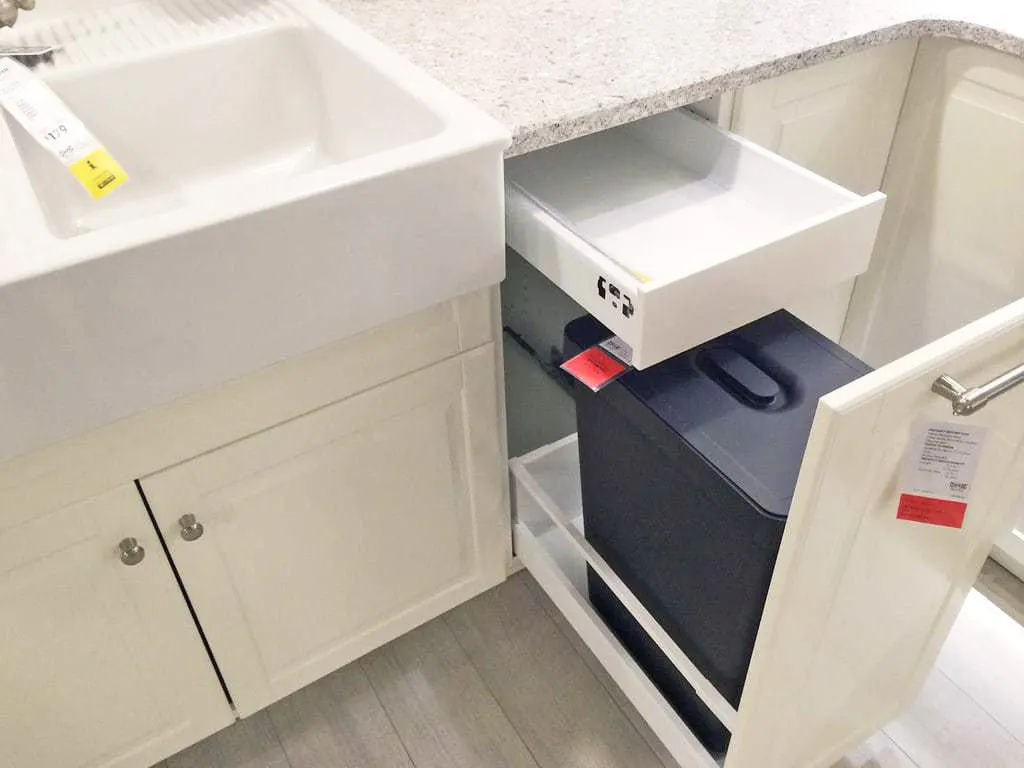
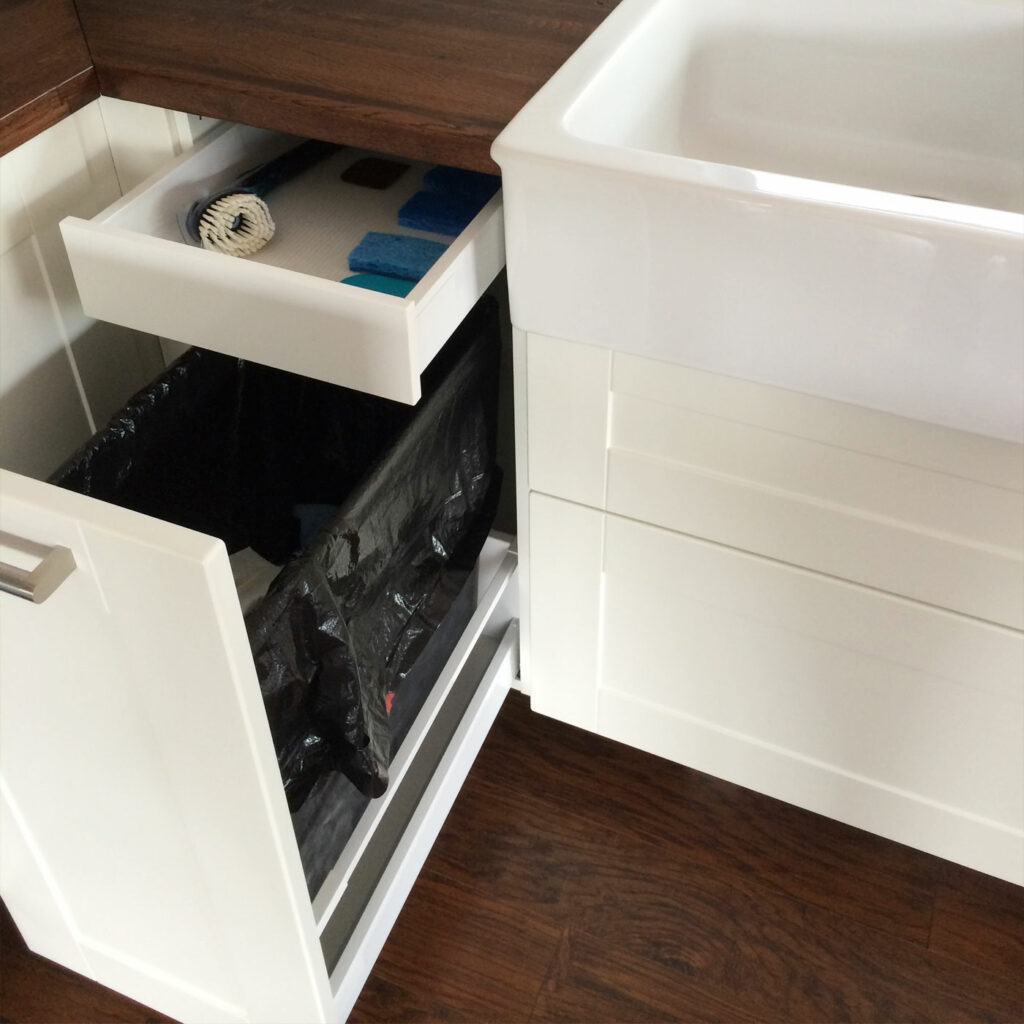
To go with the lower drawer situation, I wanted a hidden trash can. Easy enough. But of course, Ikea took it a step further with another drawer-in-drawer option that put a small pull-out right next to the sink, perfect for sponges and pot scrapers.
How to Plan Your Ikea Kitchen Online
When it was time to start planning our kitchen remodel, armed with the knowledge we gained from our in-store visit, I went straight to Ikea’s online Kitchen Planner tool. With all it’s faults and flaws, it was still very helpful. We started working on the kitchen design in February 2015, the same month that Ikea completely revamped their kitchen products and came out with the new SEKTION system. Talk about luck. But not only that, when we were ready to buy the kitchen in March, they were holding their annual Kitchen Sale and we saved an extra 15% off an already inexpensive kitchen. Seriously, it may have been a little more effort on our part (but we love DIY anyway), but the cost difference between Ikea and a custom kitchen elsewhere was more than worth it.
A few things we opted to pass on purchasing from Ikea:
- Interior drawer lights (though they are really fun, we just don’t have a need for opening drawers in the dark)
- Countertops (ours are custom made from reclaimed wood by Defiance Woodworx)
- Appliances (yes, they actually sell appliances)
- Sink faucet
Alright, we’ve checked out options in-store and and gotten started on building out our dream kitchen on Ikea’s online tool. That’s just the beginning. What comes next is the real fun (I’ll let you decide if that is sarcasm or not).
I measured and measured and re-measured our space to be sure I was fitting things exactly as they would go. This wasn’t exactly cut and dry in our case because we had 2 walls in the way that we were planning on removing, so it wasn’t just dragging a tape measure across the wall and I was afraid of being even 1/4″ off. So Step 1 is definitely measure, measure, measure. And make sure you account for the furniture in the room if you have an open floorplan like us. We had a mishap with the island because I thought the sofa had more room. It didn’t and now we have a smaller island than I had planned for.
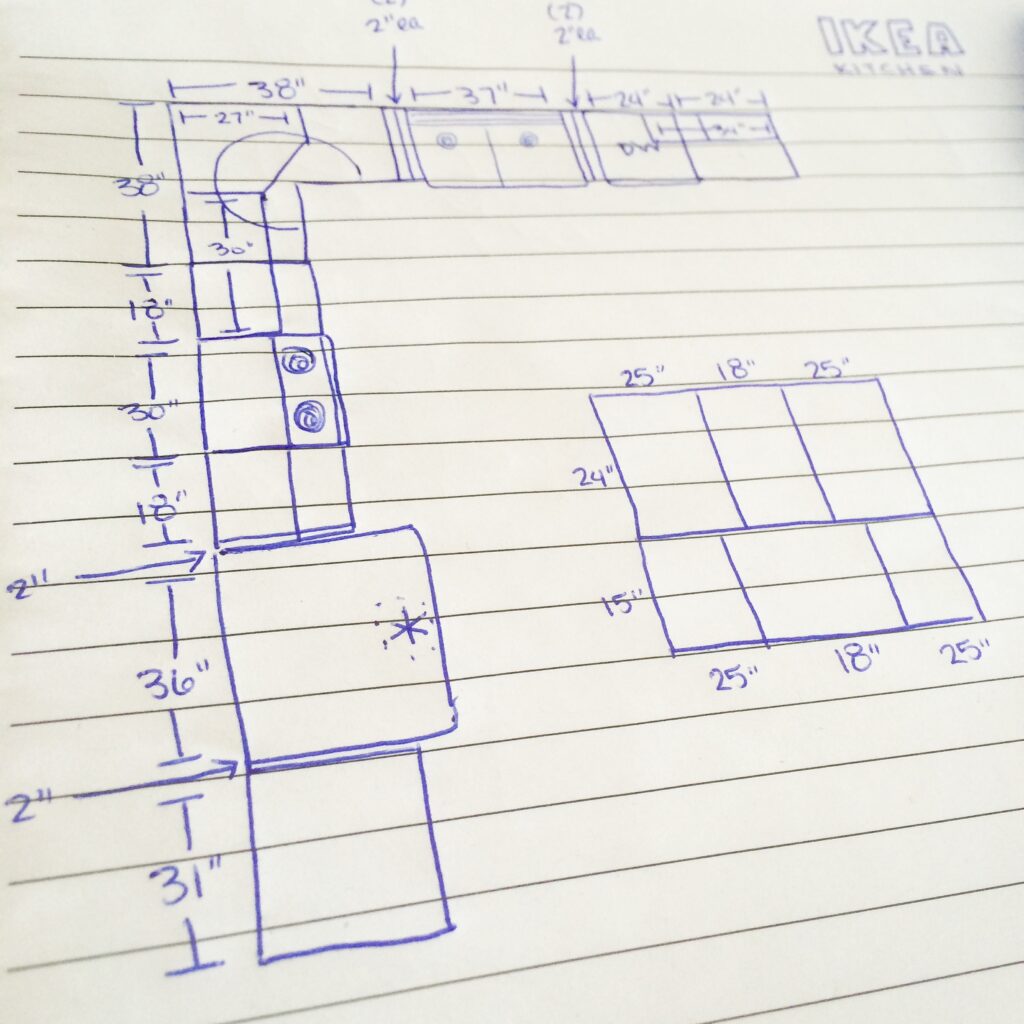
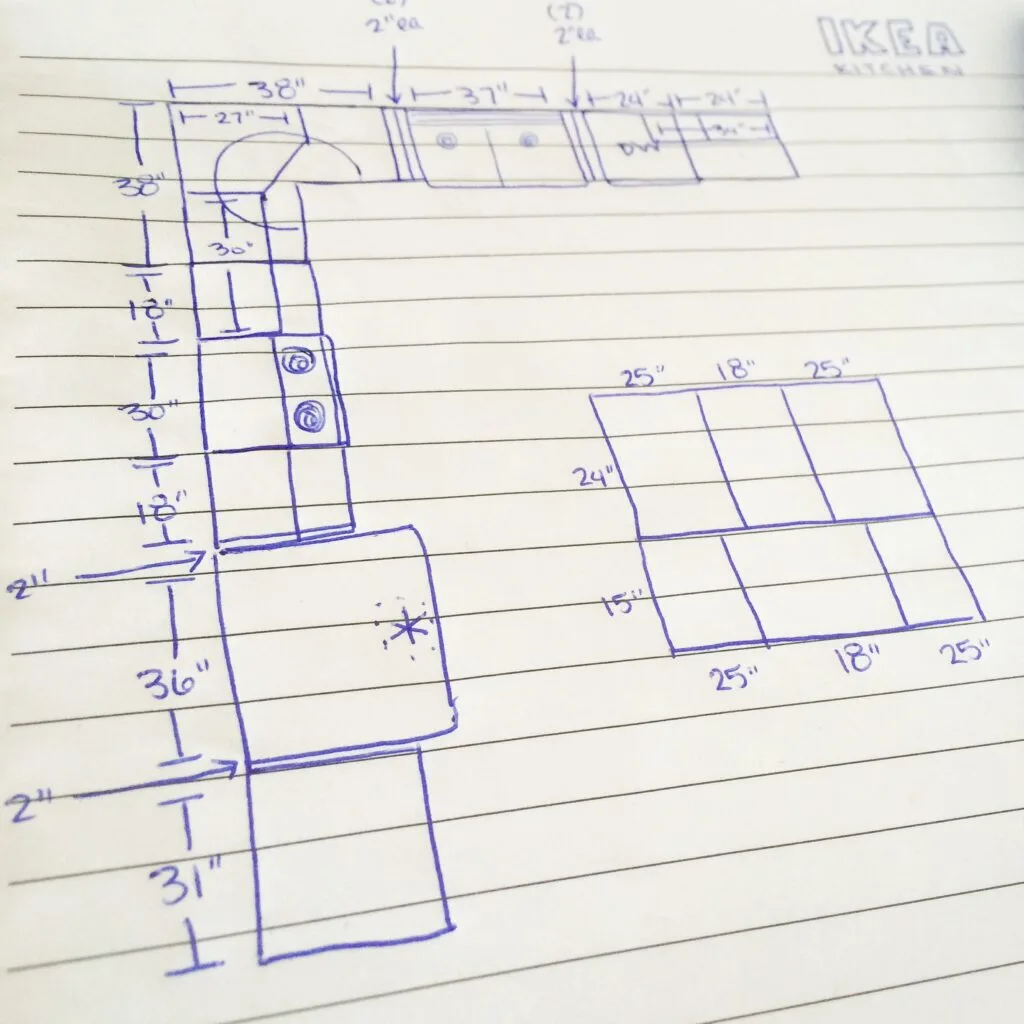
Step 2 is take those measurements and put them in the Kitchen Planner tool. The Ikea Kitchen Planner tool is an absolutely necessary step to make sure you get exactly what you want. Build your room, place windows, doorways, etc where they need to go before you start adding cabinets and appliances. As I said, we didn’t purchase appliances from Ikea, but I did use them in the planning process to make sure my spacing was correct and cabinets were placed correctly (and because I needed that visual of what the kitchen would look like with the appliances in place).

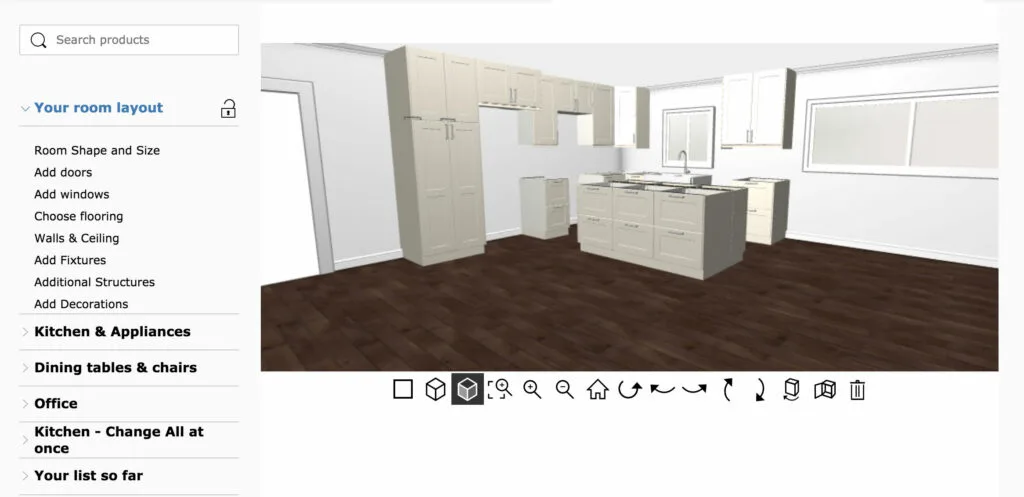
Once the “room” was built and windows/doors placed, it was time to start dragging the cabinets around and configuring the space. Ikea makes it pretty easy by categorizing their products in the tool and having some preconfigured options. I went back and forth on the corner cabinet about 30 times and ultimately settled on the Corner Base Cabinet with the hidden lazy susan. This gave me a small amount of space between the corner cabinet and the sink to put a trash drawer. One of the best decisions I made in the plan, without a doubt. I’ve always wanted a hidden trash can.
Purchasing Your Ikea Kitchen
So after the tremendously long process of figuring out what you want and placing it in the tool, you’ve got to go in to the Ikea store (well, you don’t have to but we did and it made a world of difference) and sit down with one of the kitchen design staff. They will review your entire plan, help you fix things that maybe aren’t quite right, offer suggestions on how to improve things, and let you know about other products you need that you may have otherwise missed with just using the online tool. Case in point, apparently there’s a kit used to attach the island that we didn’t know about, as well as another kit for hanging a micro-hood. We would have had to make unnecessary trips back to the store (a 3-hour round trip) mid-renovation had we not had the kitchen design staff let us know about these things. There were various other items, all of them minor, that made the process easier and limited the number of trips we had to make to the store.
At the time we purchased the kitchen, we also bought all of the interior fittings (drawer organizers, etc) and handles. That’s because those items were included in the 15% off sale and there was a minimum price to get the discount. Had we purchased those things separately at another time, no discount. Definitely plan ahead.
All of our lower cabinets are drawers (with the exception of the corner lazy susan) and with the SKETION system, you can put drawers within drawers to maximize your space. When I had all the drawers and upper cabinets planned out, I then went through my inventory of kitchen tools, small appliances, flatware, dishes, glasses, you name it. I planned where everything would go and what interior fittings I would need to make sure they would all fit. And it did, with room to spare. I have never had a more organized and efficient kitchen than I do now with the drawer-in-drawer situation.


Pros & Cons of an Ikea Kitchen
So far, an Ikea kitchen sounds pretty great, right? But there are a few downsides to it:
- When we ordered our kitchen, not everything was in stock. We scheduled home delivery instead of lugging it all home ourselves, so we thought “great, they’ll just deliver those items when they’re in stock“. Nope. They don’t do that. You have to keep checking the stock on your own and go pick it up when it’s available. Remember all those 3-hour trips to the store I was trying to avoid? We wound up making at least 4 of them and I still had to order some parts from another store out of state. Our over-the-fridge cabinet didn’t have door fronts for 4 months.
- It’s Ikea, and just like everything else there, it comes flat-packed with lots of assembly required. I’m no stranger to assembling Ikea furniture, and I actually (weirdly) enjoy it so I wasn’t at all put off by having to build my entire kitchen from scratch. But I know I’m in the minority here, so Ikea does offer installation options (see below).
- Installation. You could pay to have someone install the kitchen, but when you buy an Ikea kitchen, it’s definitely not built in to the price. As I said earlier, we enjoy the DIY aspect of home remodeling, but we had our fair share of headaches with this project. We naively thought we could get the kitchen done in 2-3 weeks. Ha!
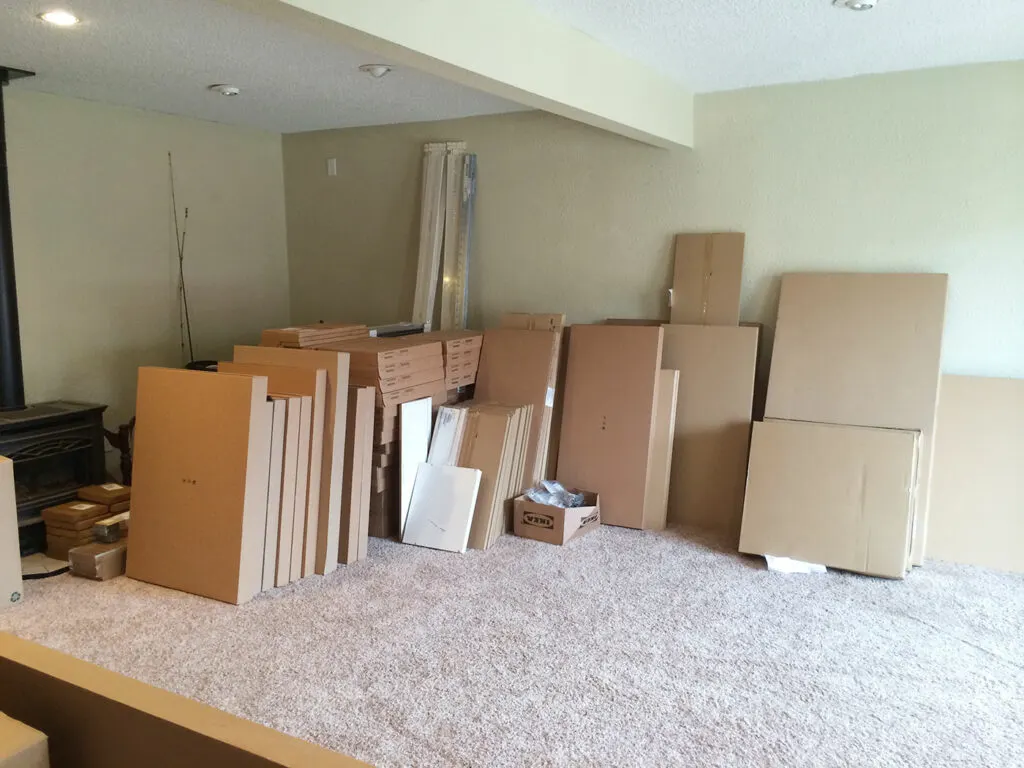
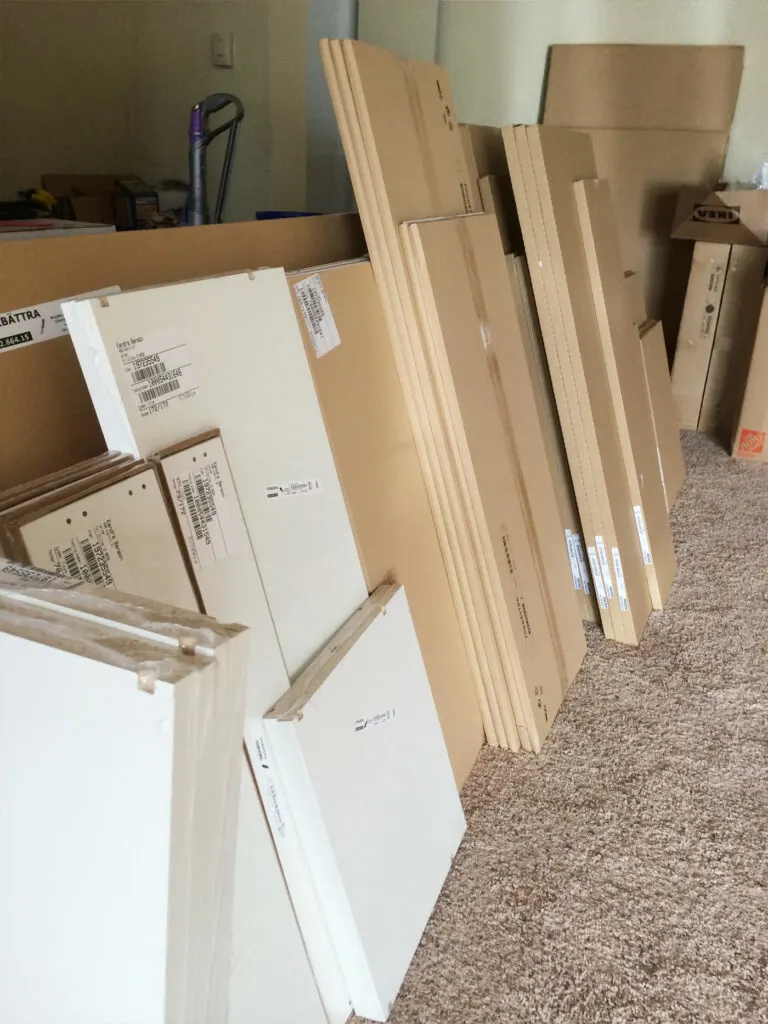
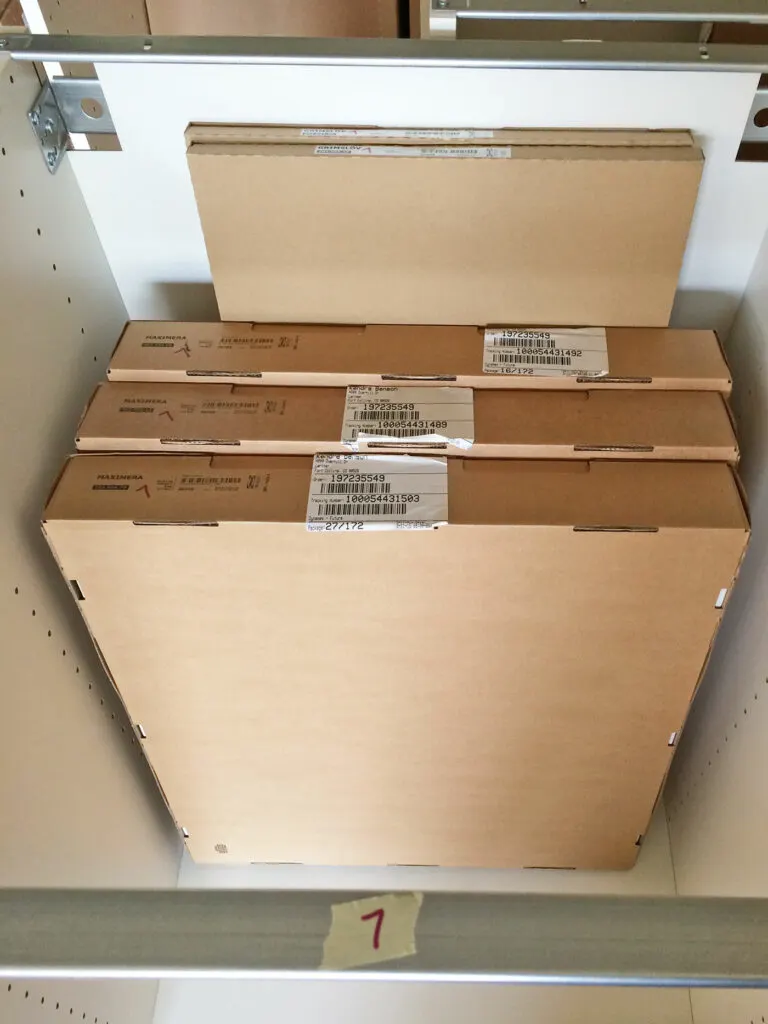
Ok, kitchen measured, designed, purchased. Now it’s time for delivery, assembly, and installation. THIS is where things get fun! If you’re interested in adding an extra twist of fun, make sure your flat-packed kitchen that will be delivered in 100+ boxes (but who’s counting) is delivered via semi on your dirt road, and backs down your dirt driveway, on a cold, wet, March morning. So fun.


Assembling Your Ikea Kitchen Cabinets
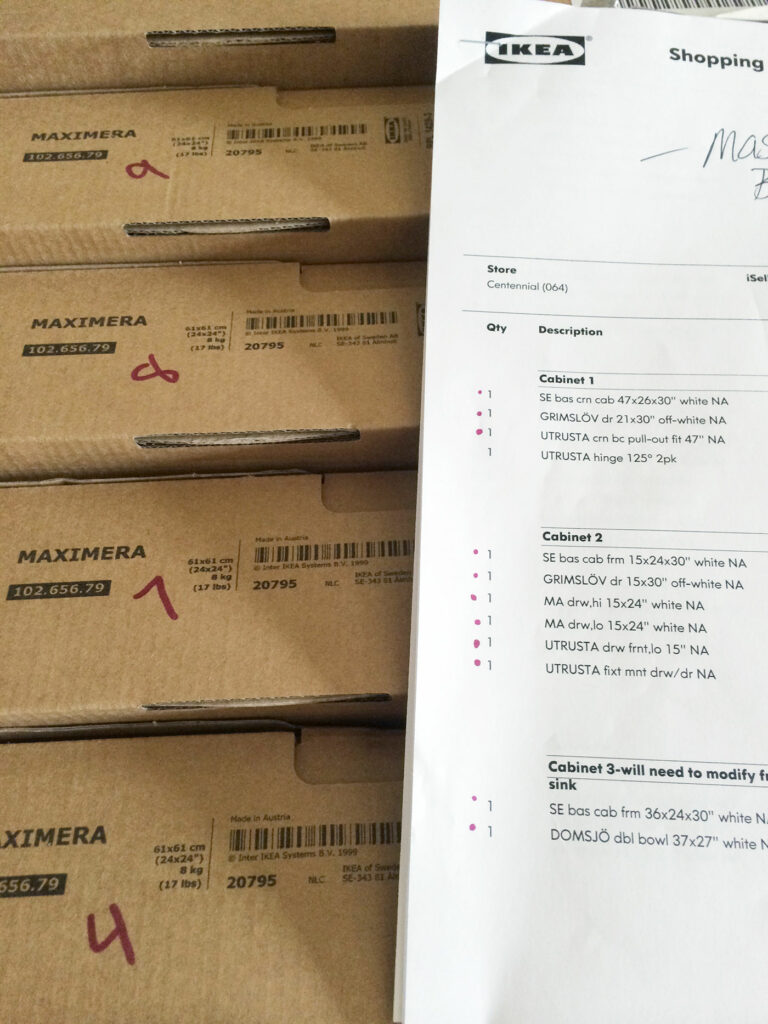
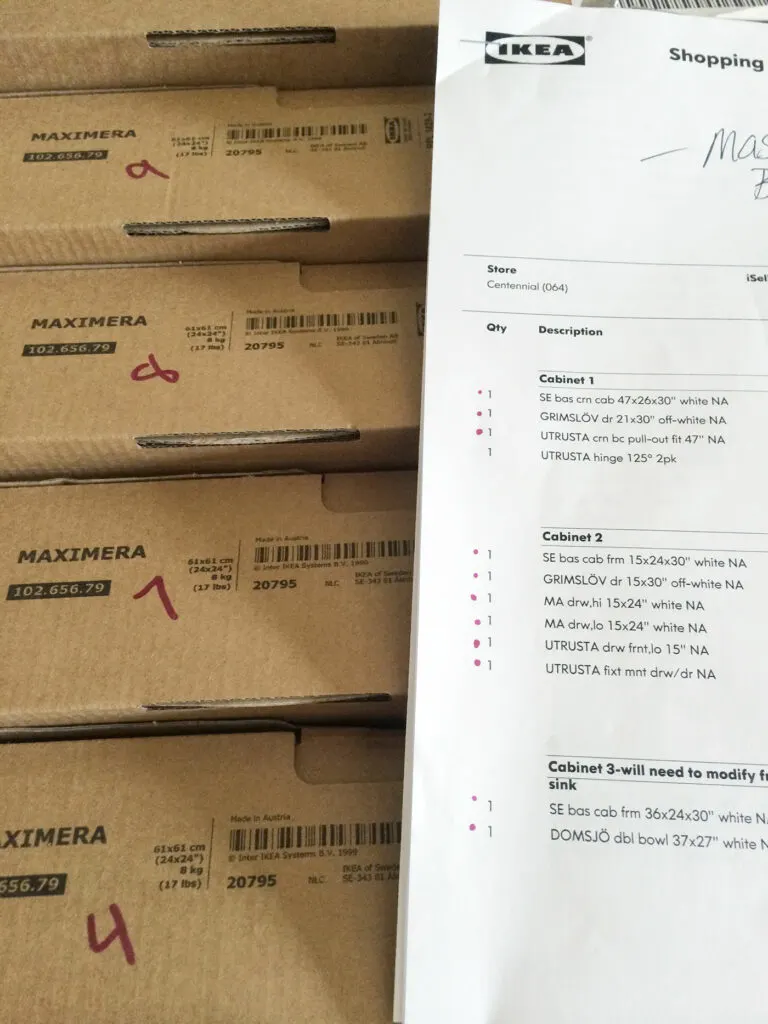
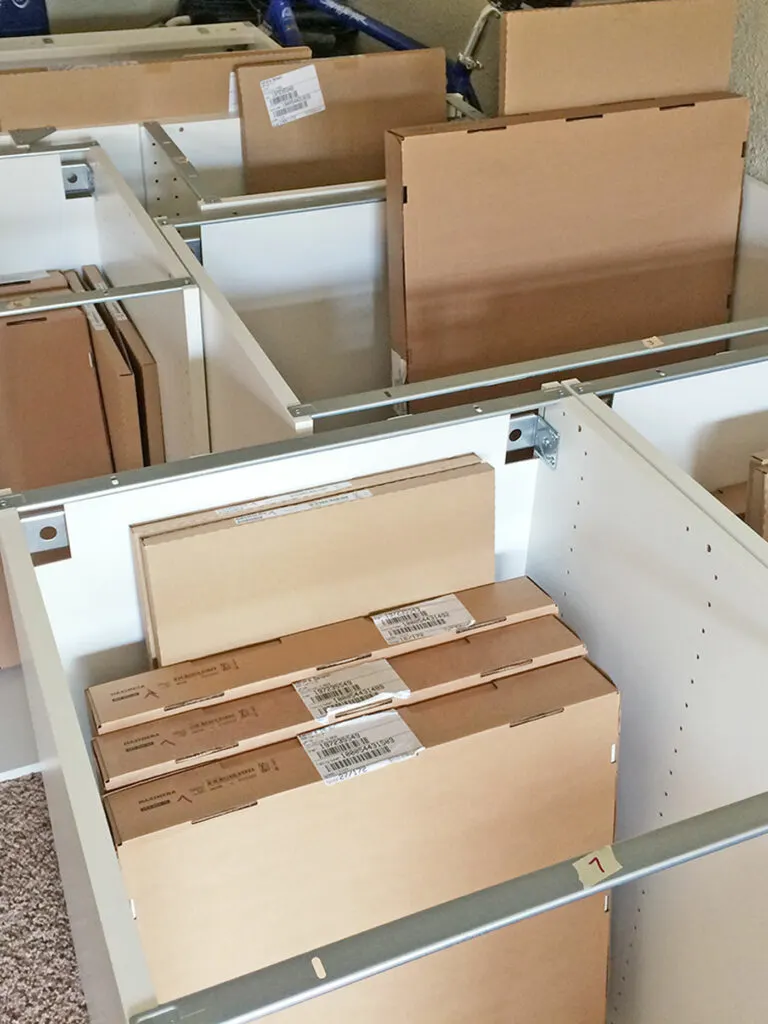
In order to make some sort of sense of the chaos, I labeled each box with a number. When you buy the kitchen, they print out a chart of your cabinets, and each cabinet is assigned a number. You also get a list of all the product numbers that correspond with each cabinet. So I took that list and labeled each box with the appropriate cabinet number and tried to rearrange the boxes in the order that I would build the cabinets. It was a process but was so beneficial to my sanity during the whole process. No searching for which box goes with which cabinet, it was all ready for me.


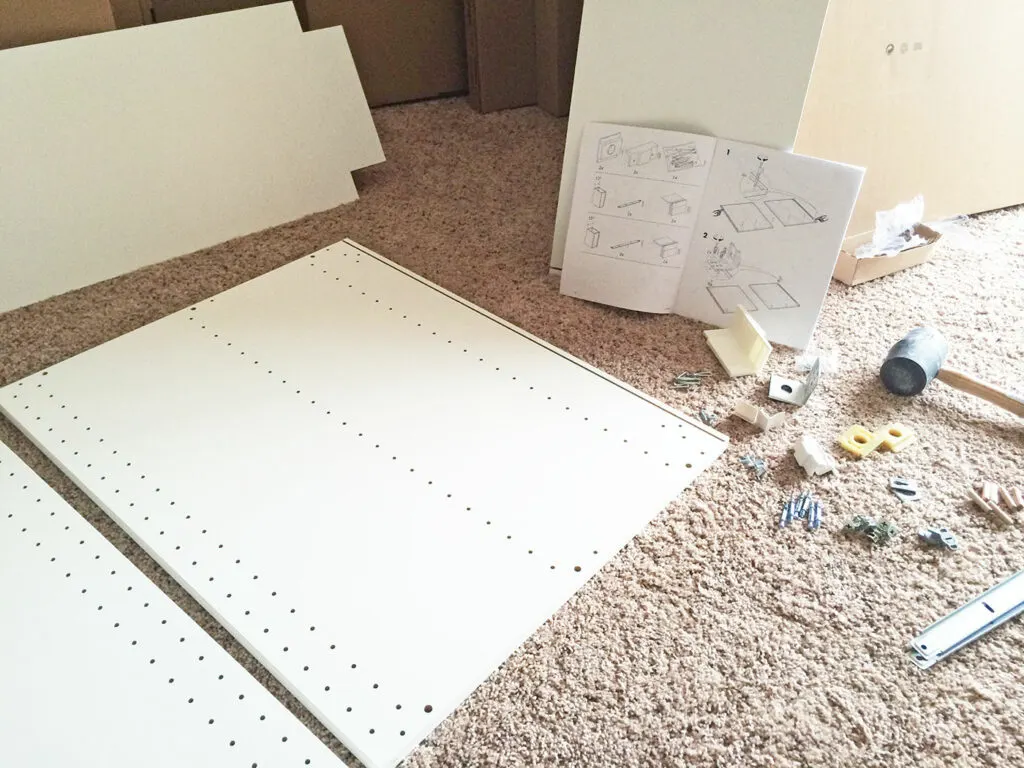
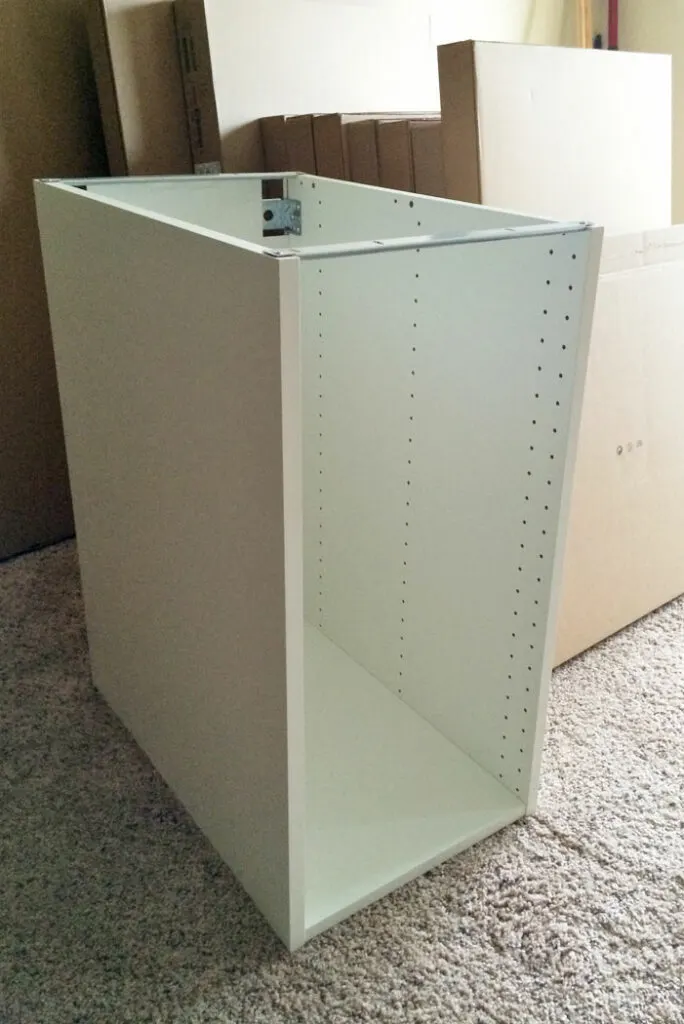
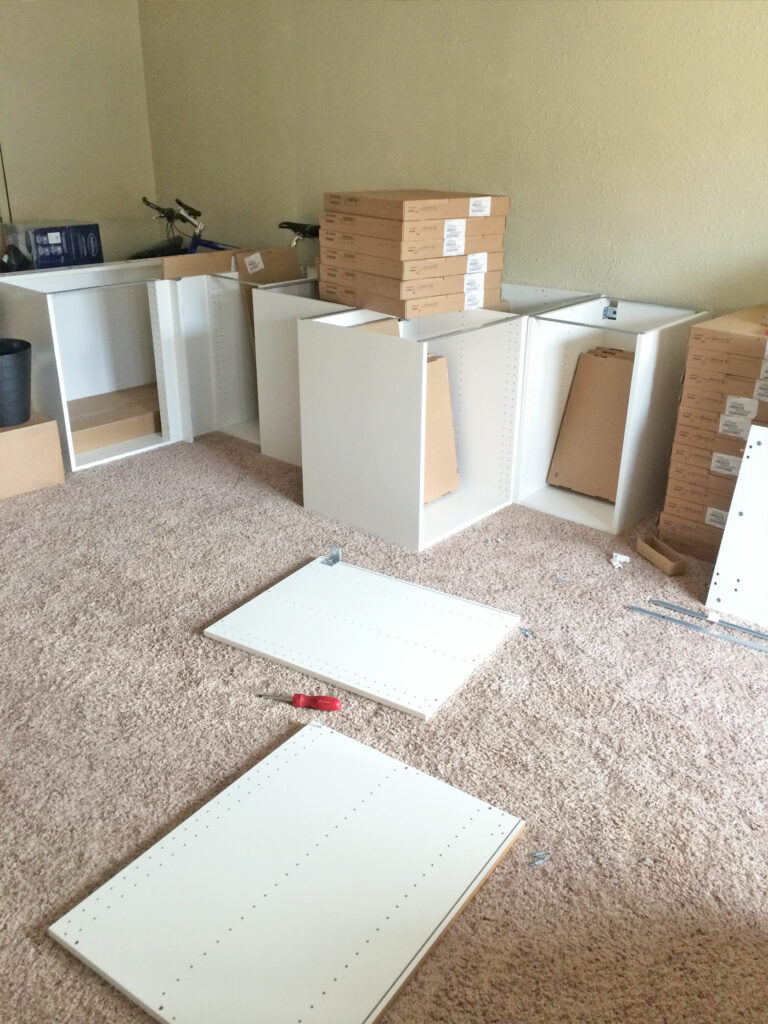
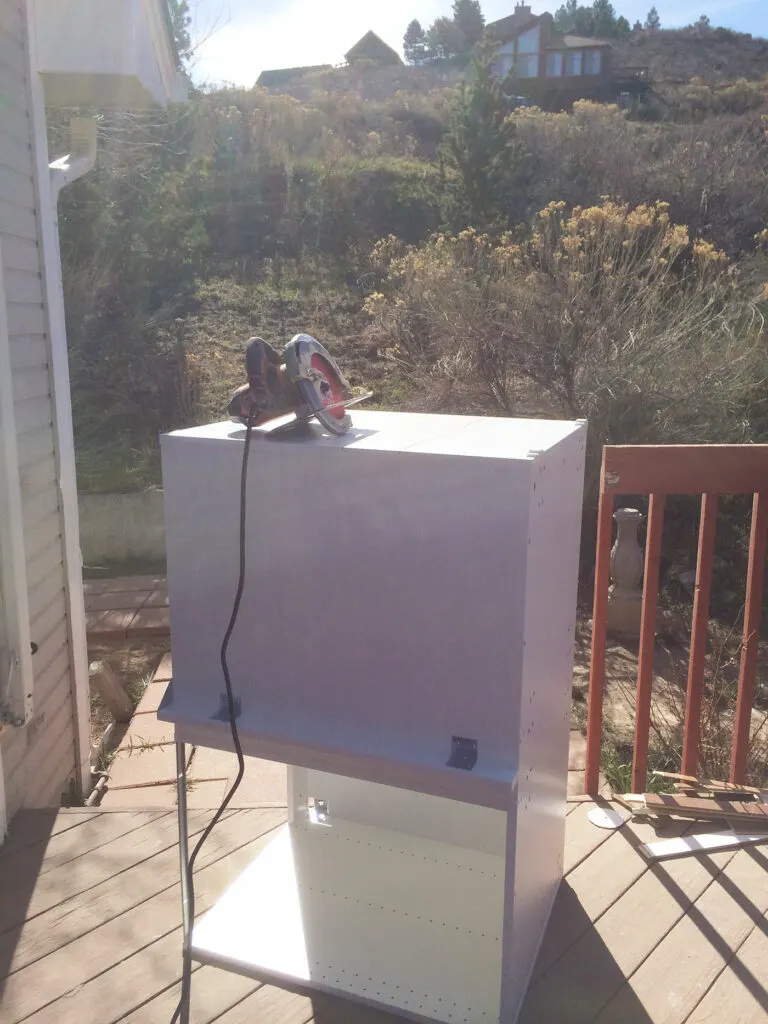
Time to assemble. Every box came with instructions, you know, those typical word-less Ikea instructions. It was pretty basic and easy to figure out and by the 3rd or 4th cabinet, I could have built them blindfolded. I would highly recommend an electric drill to screw in everything, and if you don’t have that, at least use a ratcheting screwdriver (which is what I used). My hands and arms definitely got sore after a while.


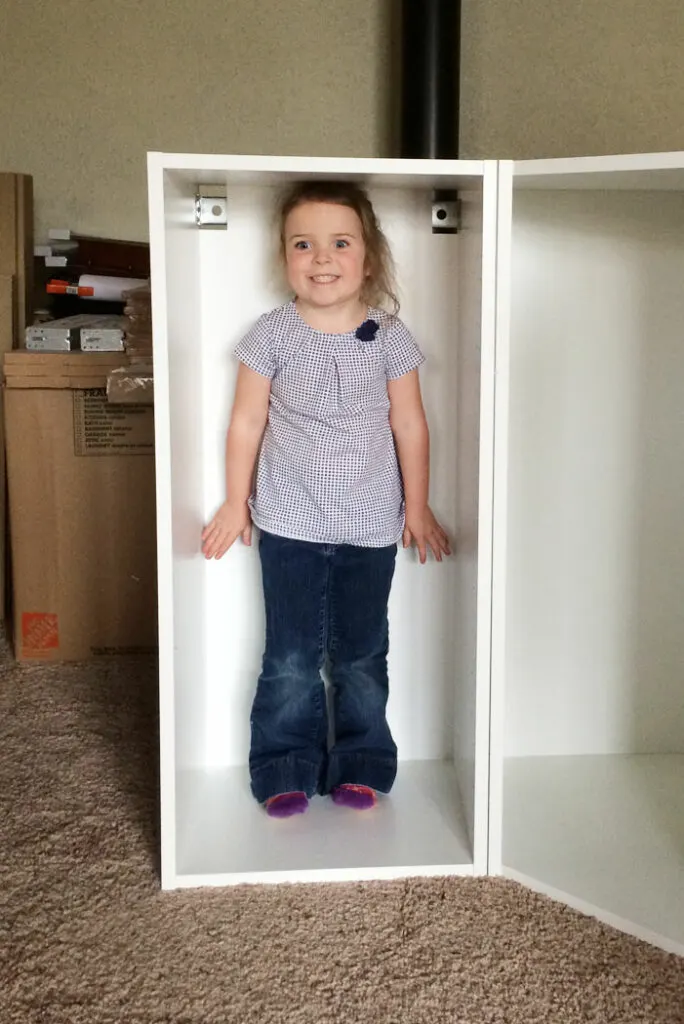
Also, make sure you have a cute 4-year-old helper to test the height of your upper cabinets and to keep you distracted from the sheer amount of time you will spend assembling.
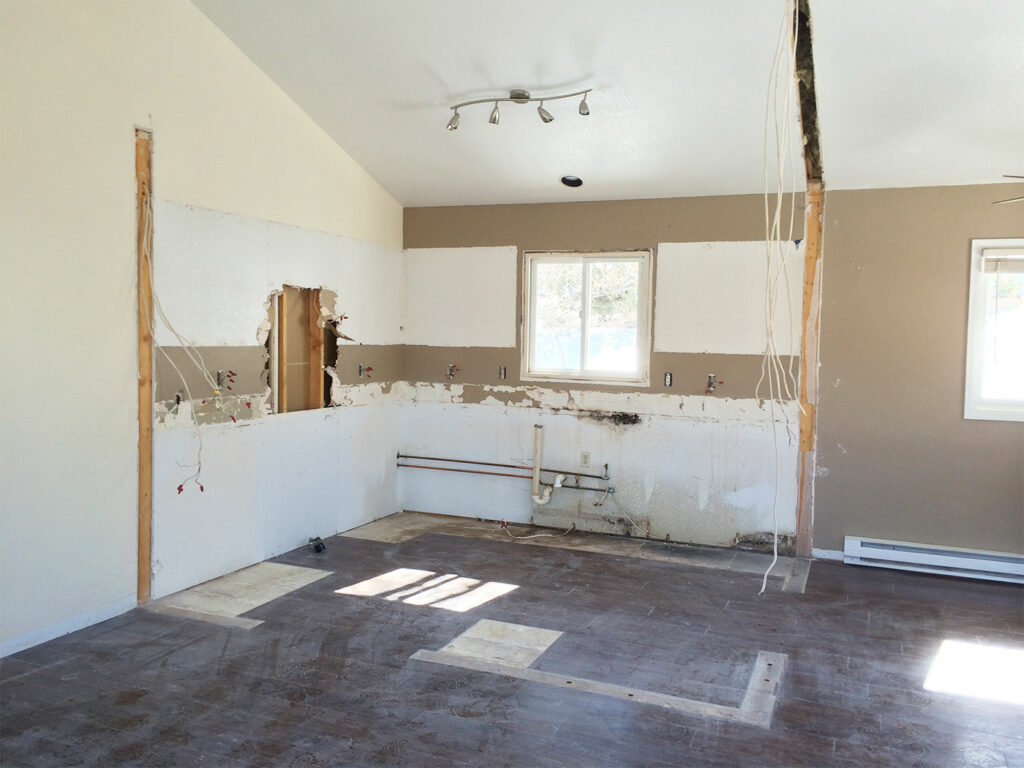
Now, I should probably mention here that it is best to build your cabinets at least on the same level of the house where you’ll be installing them, and definitely on carpet (or at least a rug). This was not a luxury available to me since we were also in the midst of a very messy demolition on the kitchen level at the same time. So I built the cabinets in the basement and we carried them upstairs, one at a time, as we were ready to install them.
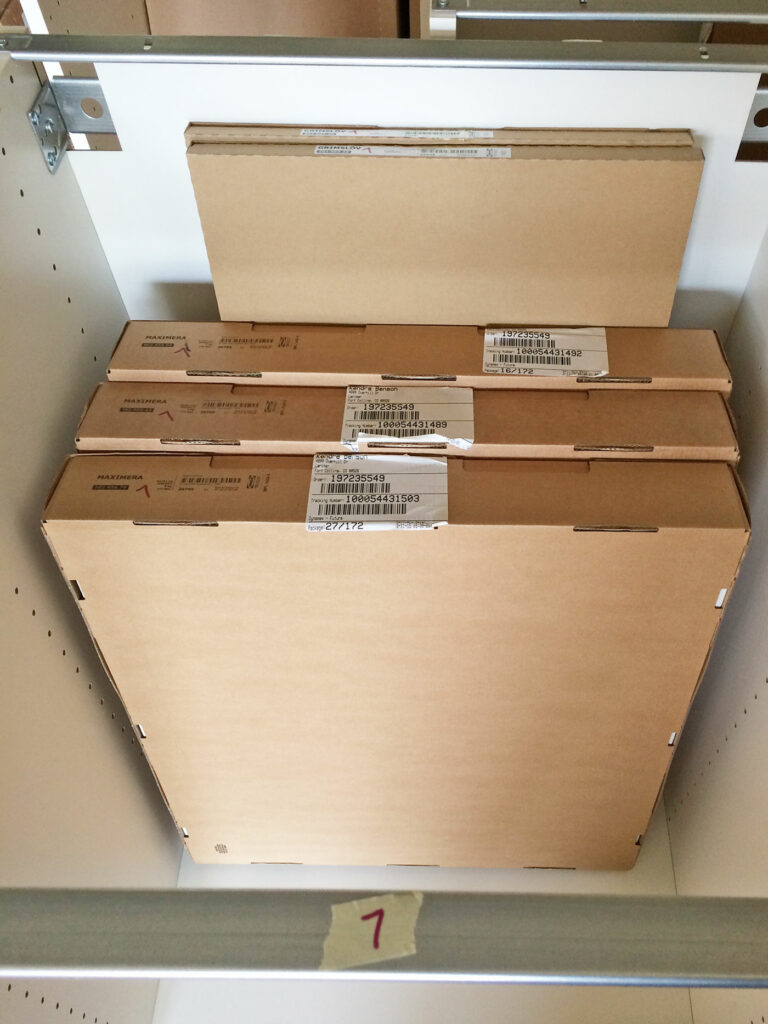
Once the cabinets were built (and even as I was building them), I stacked them on one side of the room and placed those corresponding boxes inside that held the drawers, cabinet fronts, and shelves. Just another part of the organizational process that made my life easier. I’d highly recommend you do the same.


Installing Your Ikea Kitchen Cabinets
With all the cabinets built, and the kitchen properly demolished and built back up, it was time to hang the cabinets. Ikea uses a different system to hang cabinets, which is actually pretty easy. Unless your house has studs in weird places and ridiculously uneven walls like our house. This is where those roadblocks I mentioned earlier cropped up.


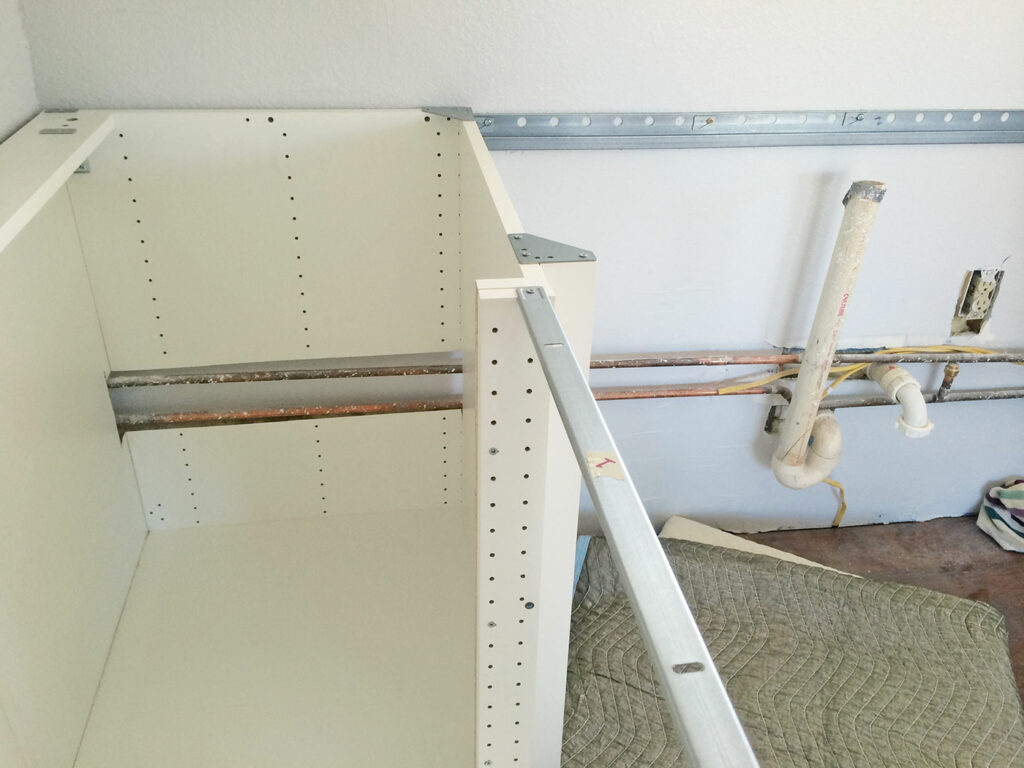
We got the upper track in place after realizing that we couldn’t hang it where we wanted it. There was a horizontal stud in the wall that was about an inch too high. This meant we couldn’t use our heavy-duty drywall anchors between the studs because they would just hit the lower part of the stud, but we couldn’t just screw directly into the stud because the screws wouldn’t be in the center of it. So we had to raise the upper cabinets 1″ to be able to screw the rails directly into the stud, no need for the drywall anchors.
That 1″ doesn’t seem like much, but if you look at our kitchen cabinet layout from the Ikea Online Kitchen Planner (towards the top of this post), you can see that on the left, we have a tall floor-to-top cabinet (for our pantry). That cabinet height is not adjustable (obviously) which means it just had to go up that 1″ and leave a larger gap along the floor for the toekick. It also meant we put a lot of unnecessary holes in the wall before we realized the problem behind the drywall.


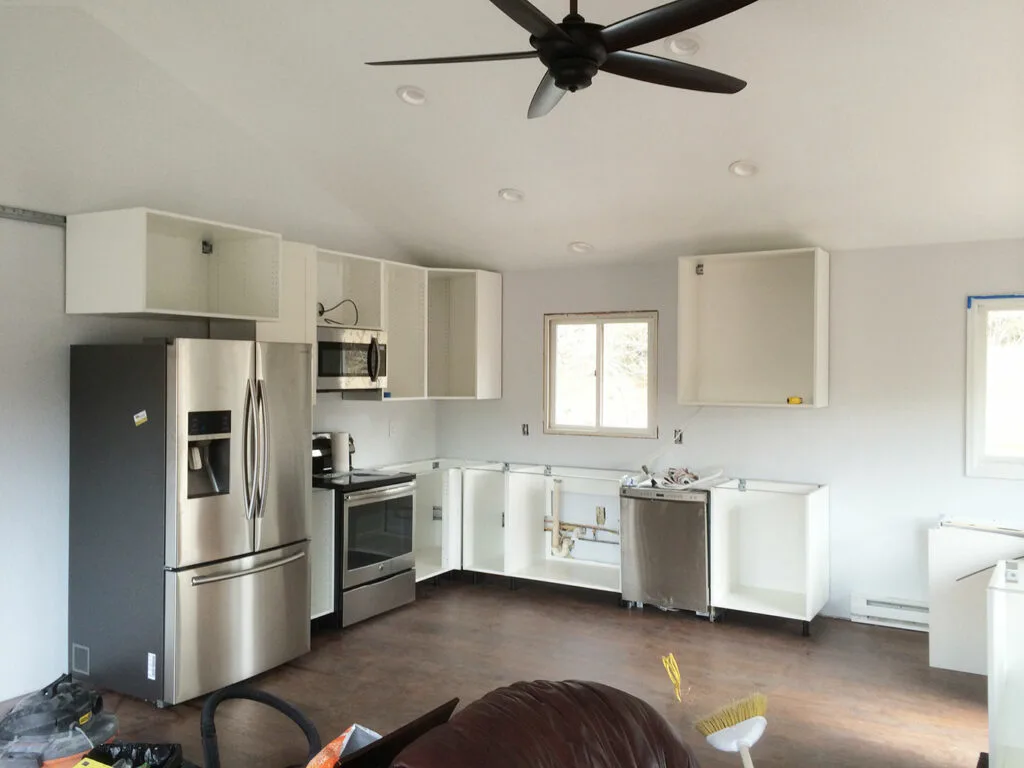
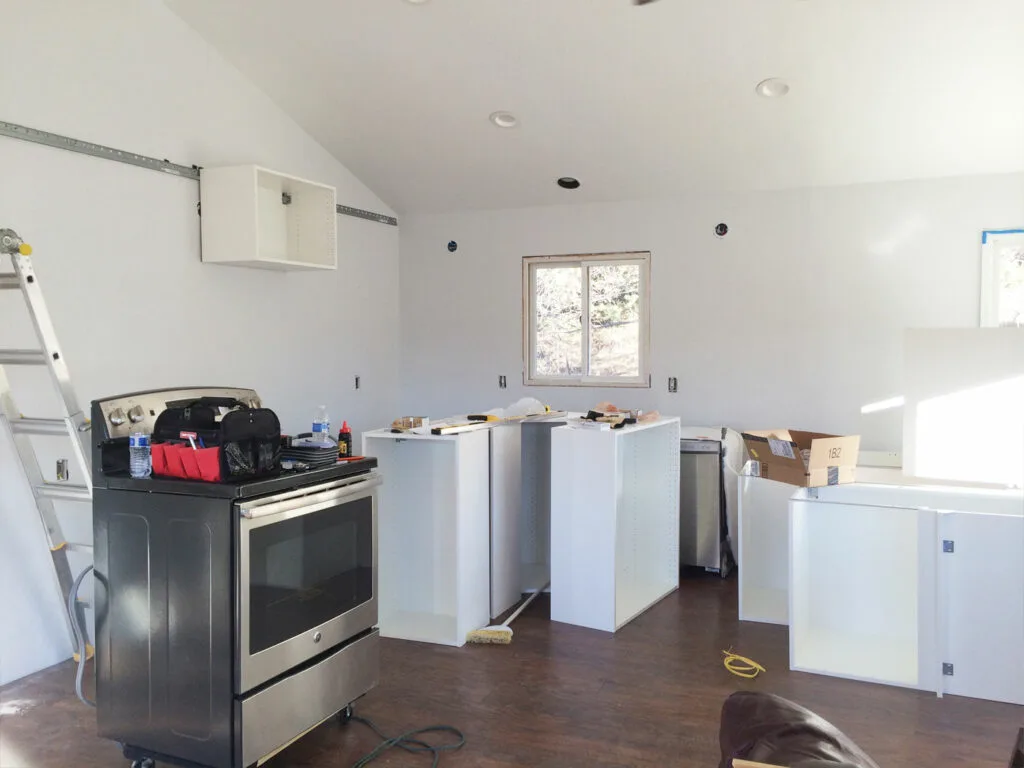
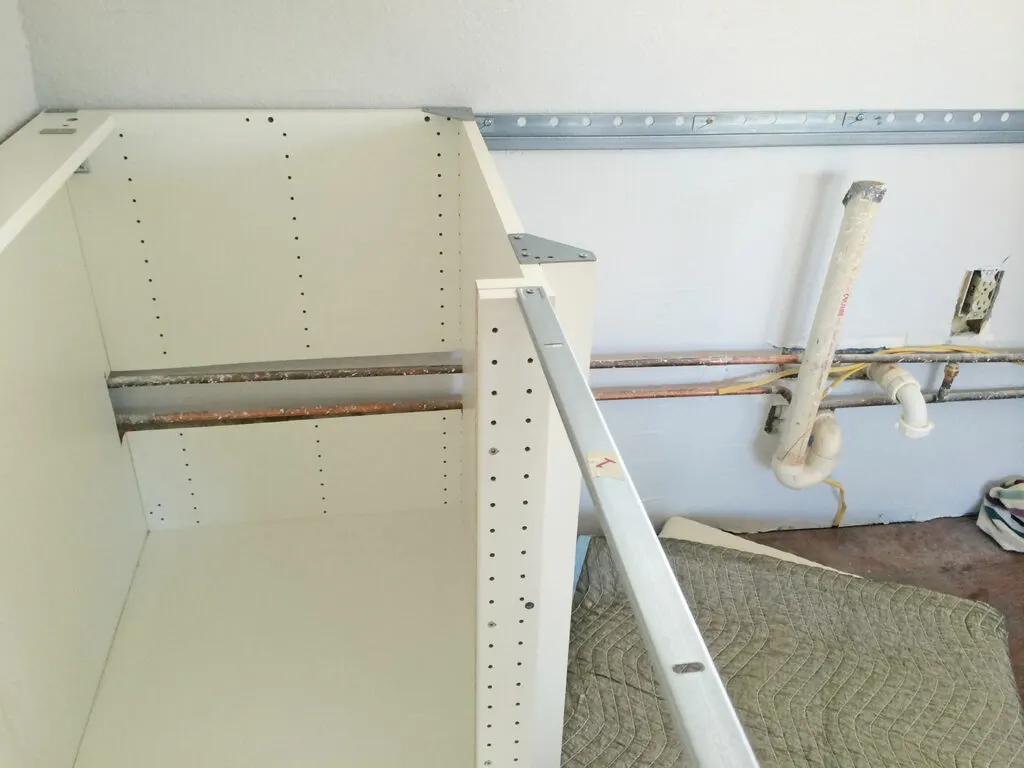
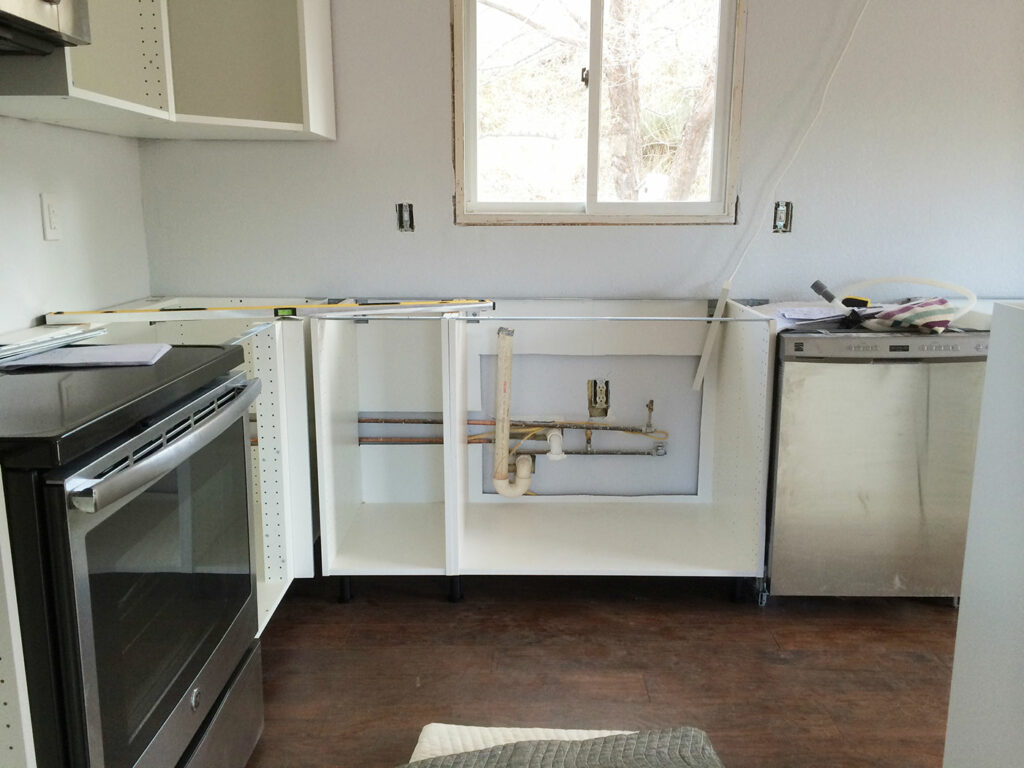
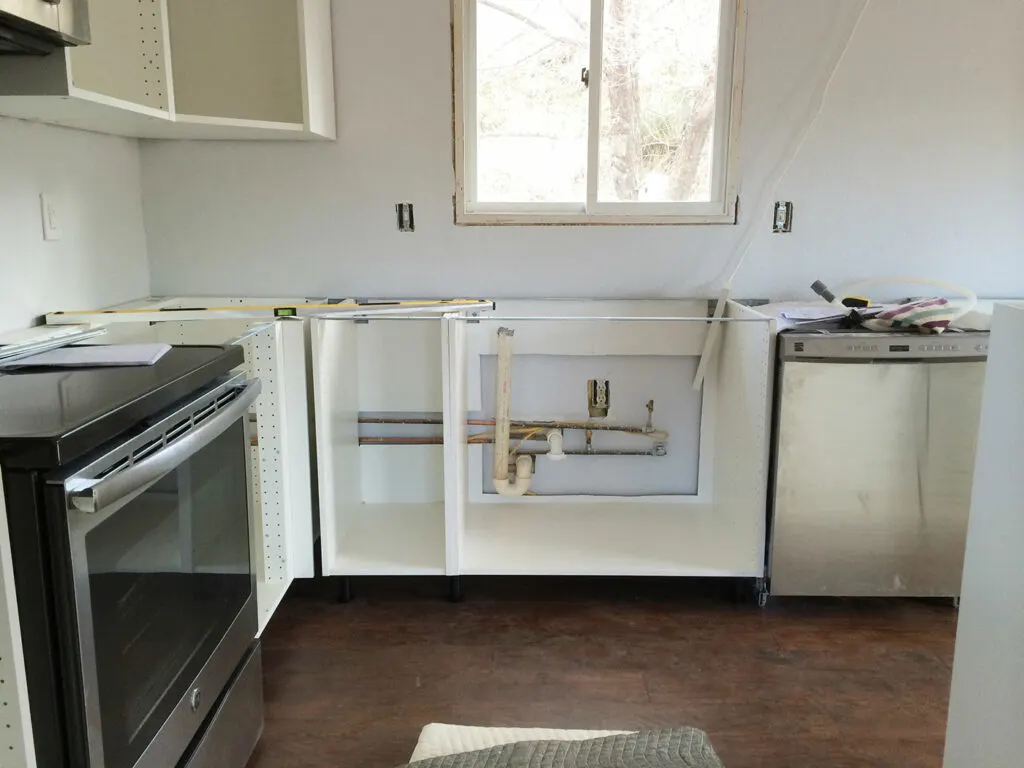
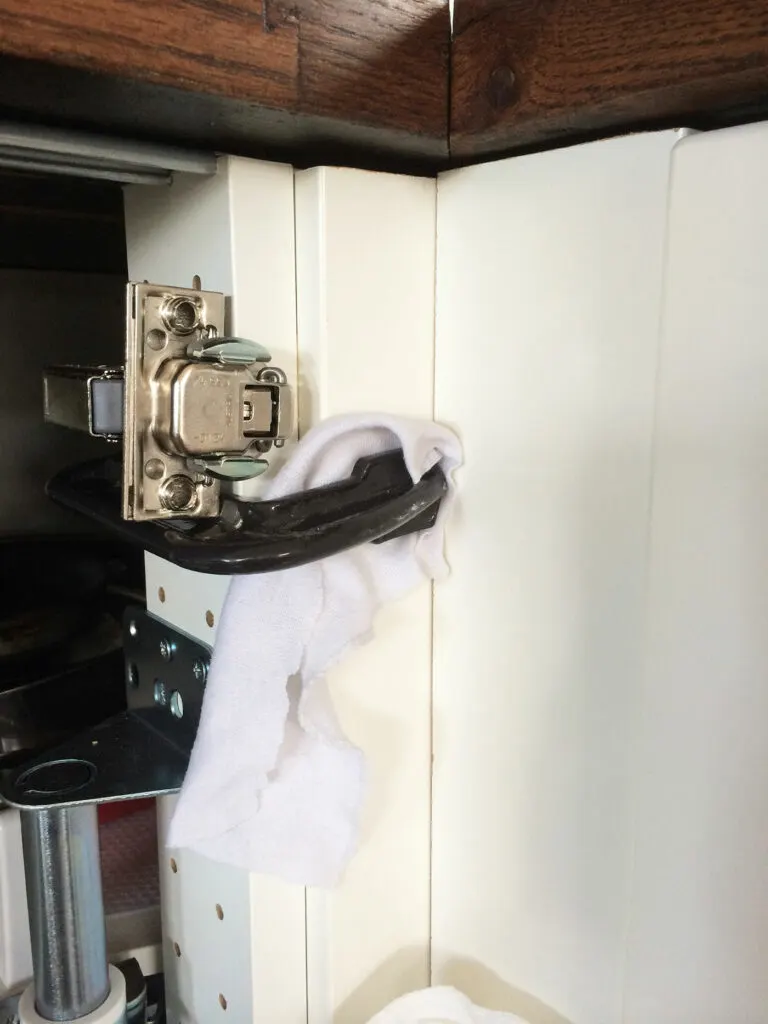
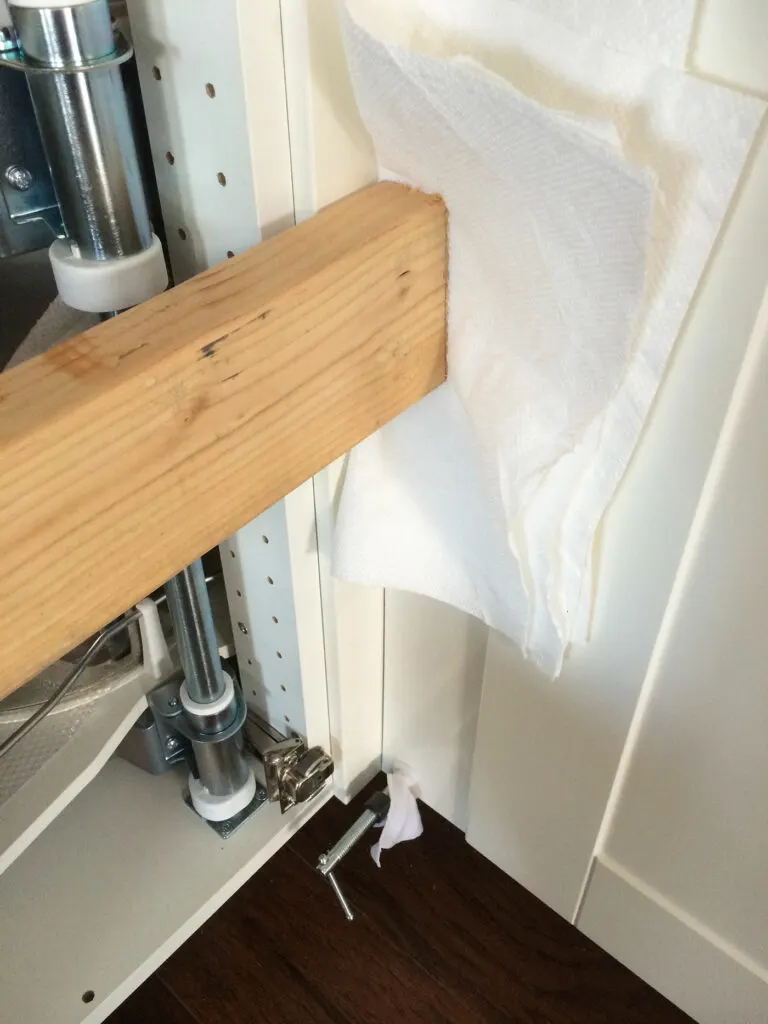
Once the upper cabinets were installed (and they must be installed first otherwise the lower cabinets will be in your way), it was time to get the lower cabinets in place. This went much more smoothly. Until we realized the plumbing was completely in our way. We were so wrapped up in all the other things going on, it never occurred to us that the pipes were not behind the wall and the cabinets would not reach the track attached to the wall.

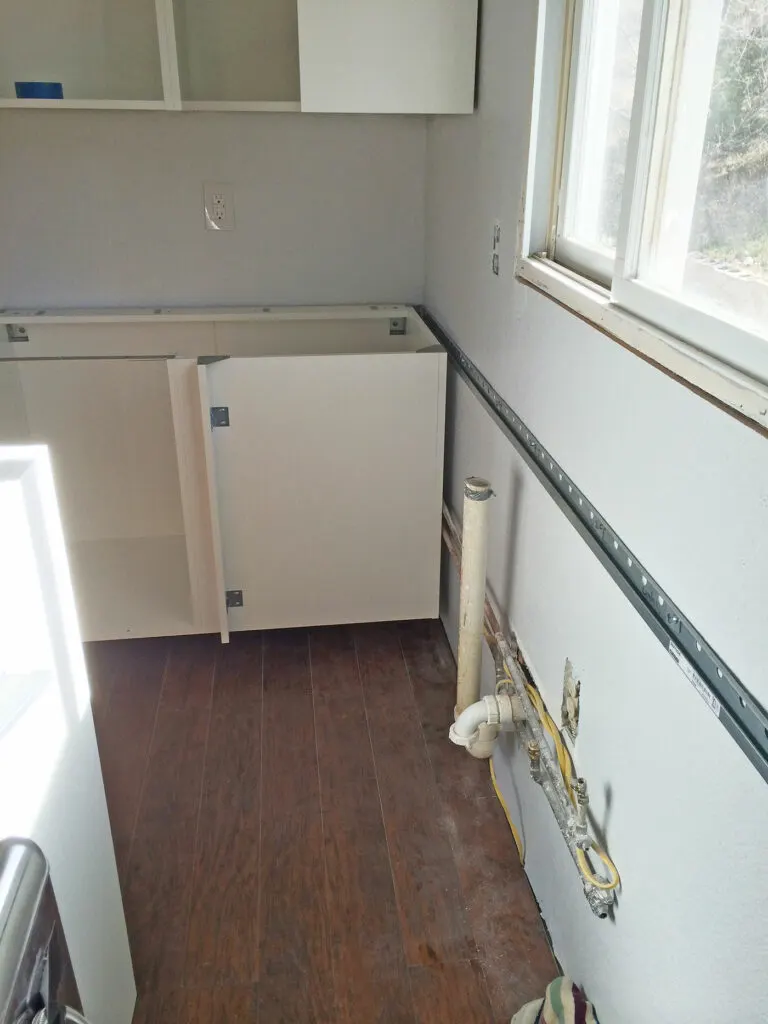

So we had to cut into the cabinet backs to make them fit. This broke my heart a little, seeing all my hard work just cut apart like that. But now that they’re installed and in use, I don’t even see back there and it makes no difference to me now.
In addition to cutting a small section out of the backs of the corner and narrow cabinet, we had to cut almost the entire back out of the sink cabinet. Fortunately, the way the cabinets are built, this had no negative impact on the stability or strength of the cabinet itself.
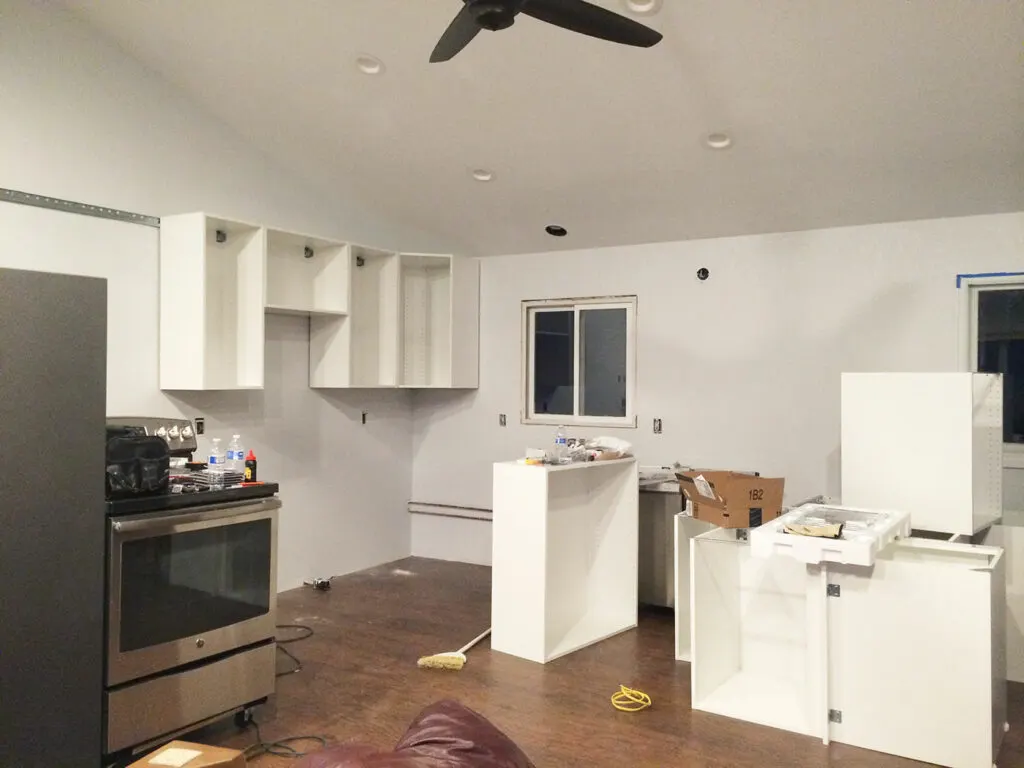
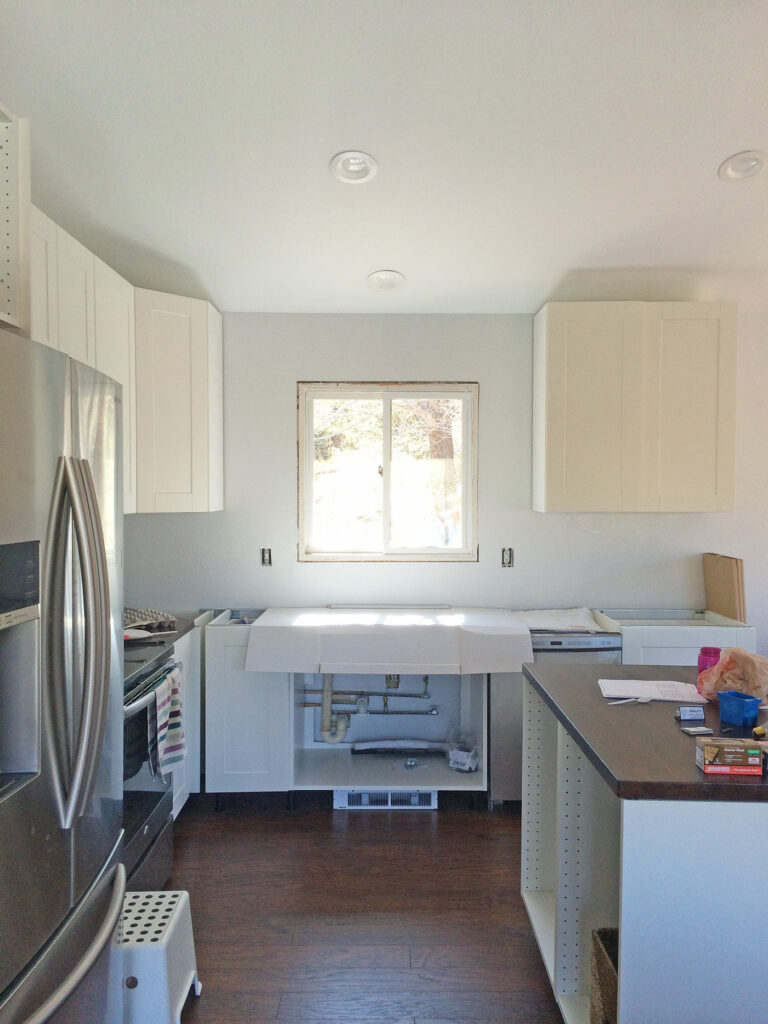
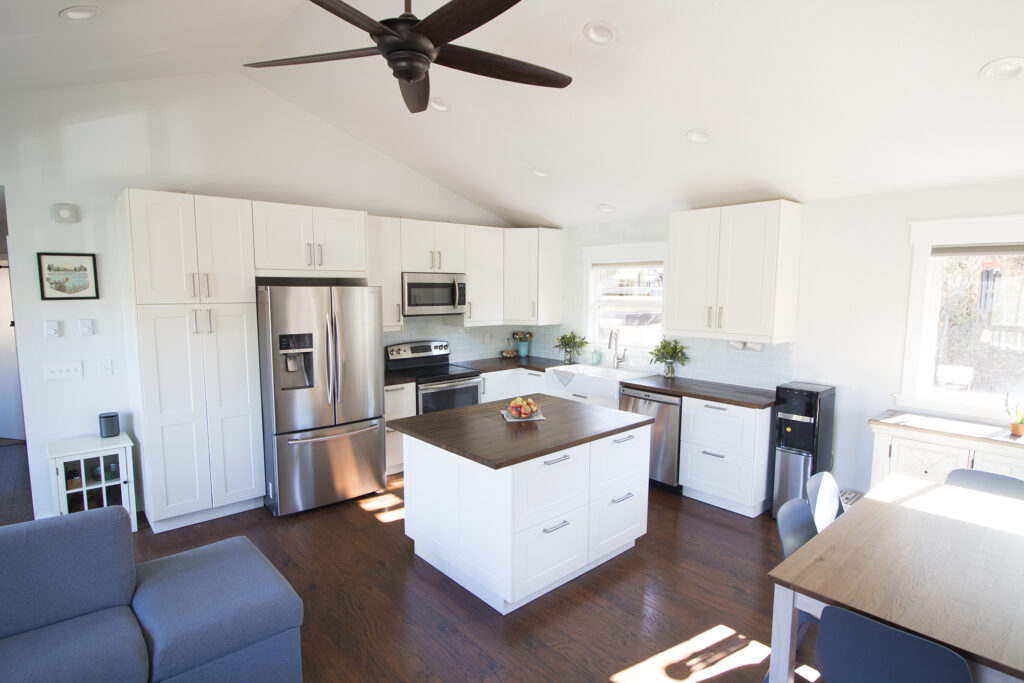
And just like that, the kitchen was coming together and looking like a for-real kitchen that I’d be able to cook and bake and eat in one day. Just one more cabinet to be installed and attach the island.
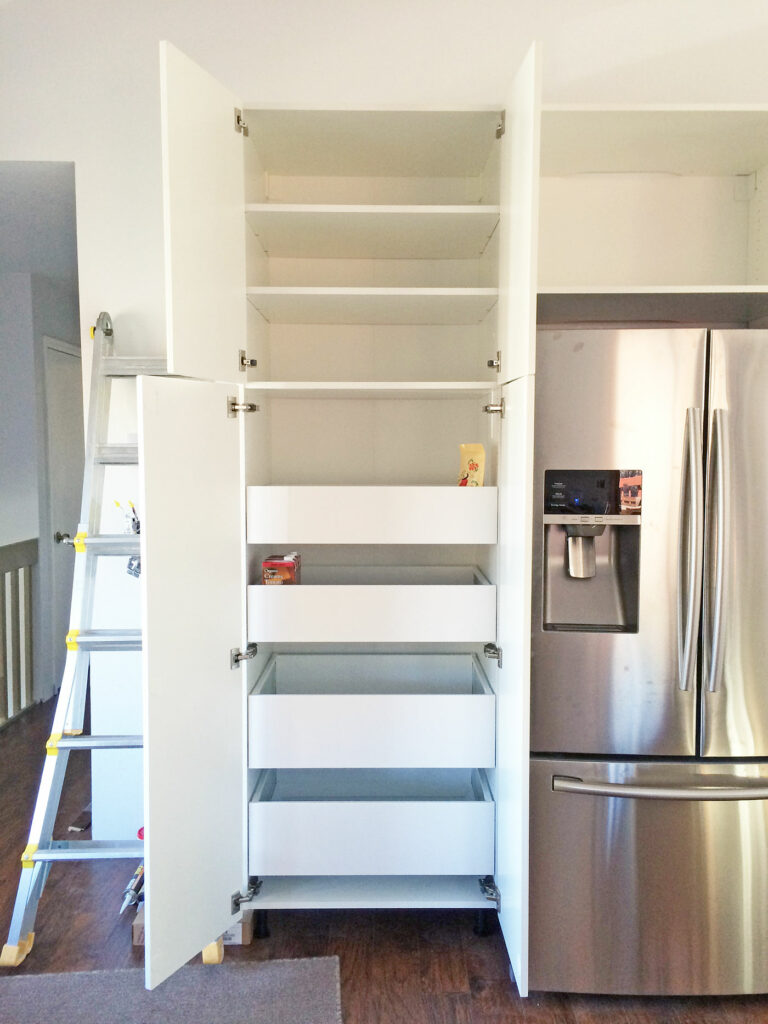
The final cabinet we hung was the tall pantry cabinet at the very end of the kitchen. This was the most nerve-wracking for me. It was tall, it was heavy, and I’m short and hadn’t been to CrossFit in way too long. But somehow I managed to help Rob muscle that beast up on to the track and it hasn’t fallen off yet, so I’m calling that a success.
And look at all those drawers. Infinitely better than shelves, let me tell you. If you get a pantry with drawers, you will not regret that decision. Ever.


Final Touches on Your Ikea Kitchen
After getting things cleaned up, It was time to get the drawers, shelves, and fronts added to all the cabinets. Things were starting to get real and I was getting very excited. We also had temp counters in place (not attached, just kind of floating there) since there was a mishap with measurements (be sure you measure twice, cut once, and get the right numbers to the counter guy).

Remember I said that the kitchen design staff knew about little nuances to make things work right? This was one of those things. There was a little extra space between the corner cabinet and the narrow trash cabinet. The design staffer told me we needed a panel to cover that, so we got one of the standard sizes, but had to figure out on our own how to get it in place (Ikea tells you how to install some, but not all, of the kitchen). So we cut 2 pieces to size, Gorilla glued them on, and rigged some blocks and clamps to hold them in place until it dried. Kind of a weird looking solution but it got the job done.


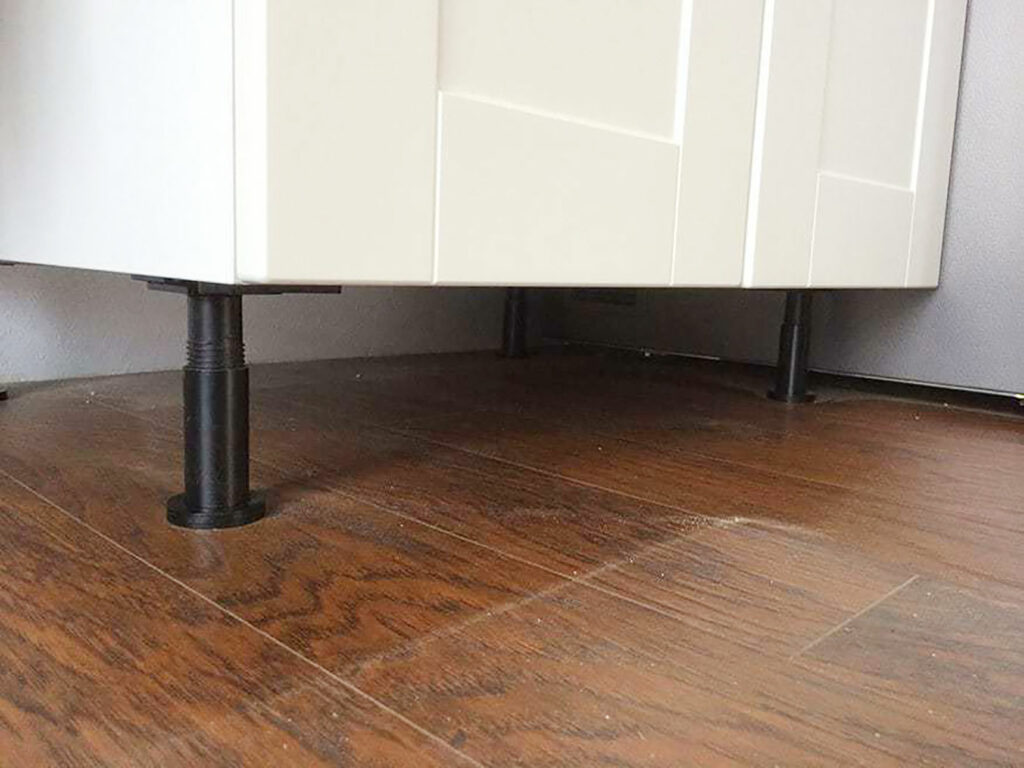
It was finally time to install the toe-kicks. I’ll be honest, the Ikea toe-kicks are pretty shoddy. They’re plastic panels that attach to the plastic cabinet legs with plastic clamps. I was pretty bummed when I realized all that, but I couldn’t figure out an easy- enough solution using real wood, so I just threw the plastic ones on as a temporary solution. 4 years later, they’re still in place and holding up fine, although the plastic end pieces that cover the cuts pop off every now and then. Ikea does have wooden toekicks now, but not in a color that matches our kitchen.


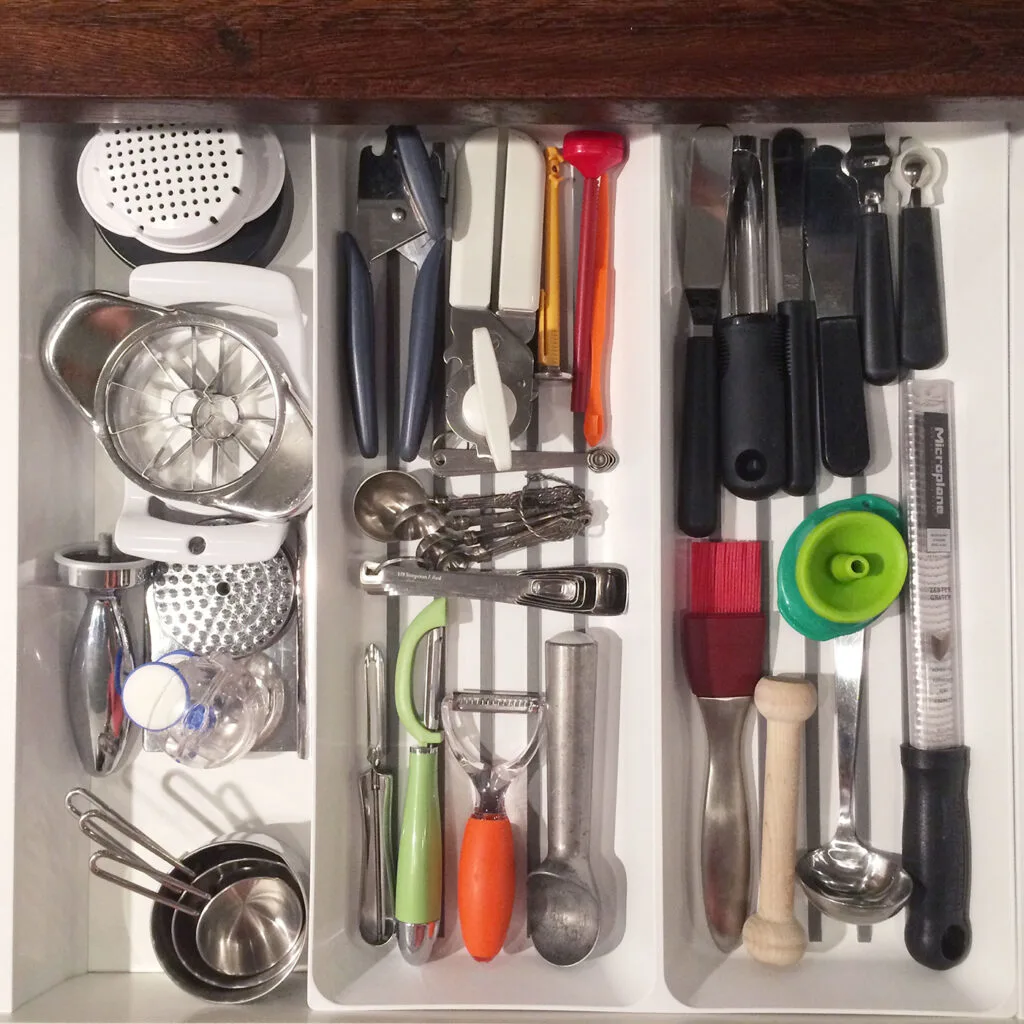
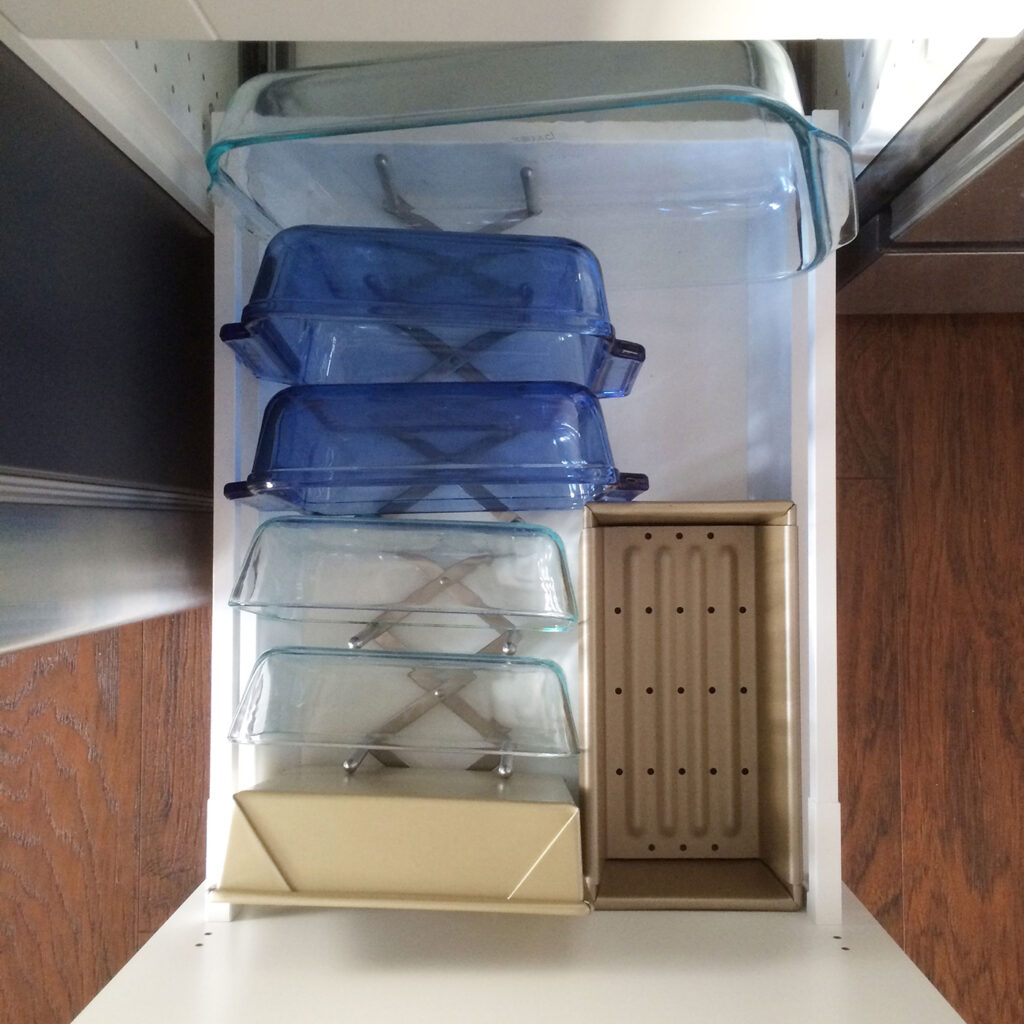
Ikea Kitchen Cabinet Organization
Want to see a few of my favorite interior fittings of our Ikea SEKTION kitchen?


The scene below is beyond my favorite part of our house. The new window with Craftsman-style trim; the massive farmhouse sink that is deep enough to wash small children and large amounts of dishes after a holiday meal; the white tile backsplash that has subtle aqua undertones that glimmer in the sunlight; the reclaimed wood countertop with warm-tinted stain that perfectly compliments the cream-colored cabinet fronts; the minimalist style of the faucet.
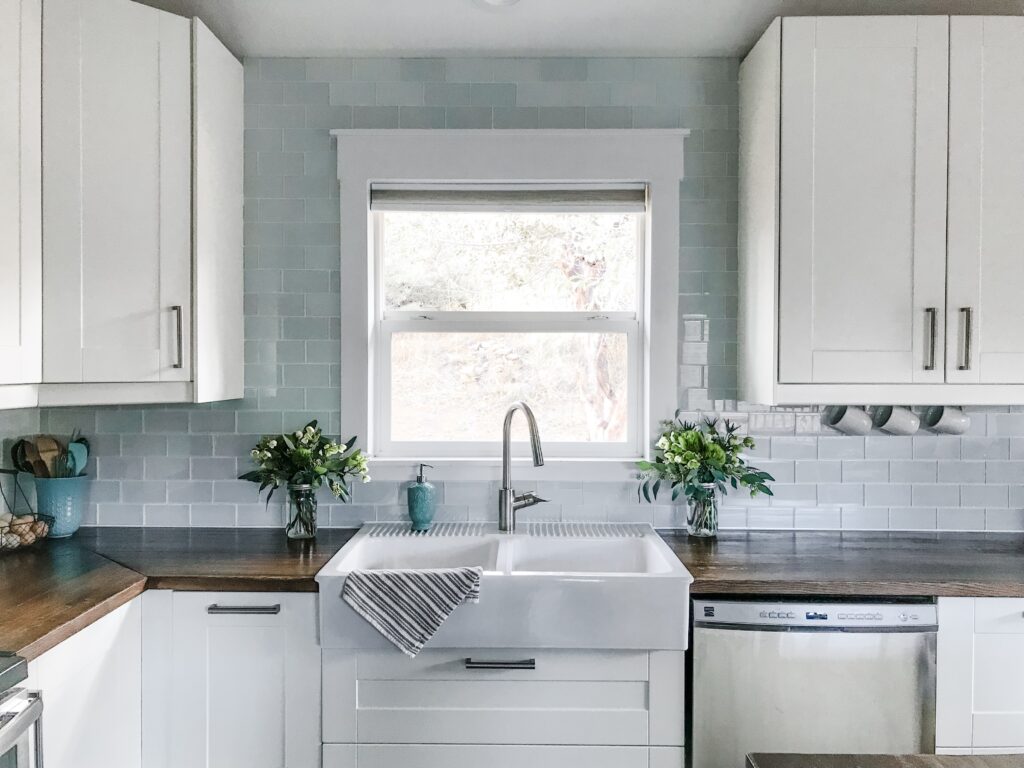
Everything is beyond perfection and more than I could have hoped for with this remodel. Even with all the roadblocks, sore arms, cuts/scrapes/bruises from building and installing every single bit of this kitchen ourselves, I would do it all again in a heartbeat. Having the total freedom to design my dream kitchen exactly as I wanted it and seeing it come to fruition by our own hands was worth the time.

Want to see the process of installing an Ikea SEKTION Kitchen island? That needs a post all of it’s own, which is coming soon. Check back for a link to that tutorial.
Materials & Sources Used
- Cabinet Base: Ikea SEKTION Cabinets (in white)
- Cabinet Fronts: Ikea GRIMSLÖV (off-white)
- Drawer Fronts: Ikea GRIMSLÖV (off-white)
- Deco Strips (bottom): Ikea FÖRBÄTTRA Rounded (off-white)
- Interior Drawers: Ikea MAXIMERA
- Cabinet Hardware: Ikea ORRNÄS
- Sink: Ikea DOMSJÖ Double Bowl
- Microwave/Hood: Samsung 1.6-cu ft Over-the-Range Microwave
- Refrigerator: Samsung 24.6-cu ft French Door Refrigerator
- Countertops: Defiance Woodworx
- Faucet: Costco (Hansgrohe)
- Tile Backsplash: Lowes
- Under Cabinet Lighting: Ikea UTRUSTA LED Countertop Light
Jiz
Tuesday 17th of December 2024
Hi, Absolutely love this. Particularly the pantry. Do you have the exact items purchased just for the pantry?
Kathy Deutsch
Sunday 19th of November 2023
Hi! I am a little confused. It looks like you ordered off white cabinet fronts but everything else was white. What made you order off white cabinet fronts if the interior of the cabinets were white? Does the kitchen look white up close or off white? Also, did you drill your holes in for the handles on your own? If so did they drill easily? Thanks!
Kendra
Tuesday 5th of March 2024
@Kathy Deutsch, The cabinet boxes only come in white, there is no option to get them in colors that match the cabinet doors/drawer fronts. We ordered the fronts in a color that suited our style, which is a slight off-white/cream color. We did have to drill the holes for the drawer pulls, which was a simple task. Ikea sells a kit that allows you to perfectly align the holes so there is really no guesswork.
Monica Sams
Thursday 1st of December 2022
WOW! What a neat kitchen.
Mallory
Friday 4th of February 2022
I’m considering doing an ikea kitchen, I’m no stranger to DIY, that said… I don’t think my husband could handle that much assembly! I know there’s always putting together but holy smokes!! You are far more organized than I! Thank you for this eye opening post as our ikea is 4 hours away!!! 😬😬 could be disastrous!
Kendra Benson
Tuesday 8th of February 2022
Haha! Yeah, I'm definitely the cabinet assembler and then we worked together to get them up on the walls. Having Ikea 4 hours away would be very frustrating because it's almost a guarantee you'll need to make multiple trips. Or else be VERY organized and be sure they have everything in stock.
Suzanne
Thursday 3rd of February 2022
Looks great! We are also installing Sektion Ikea tall cabinet to left of fridge. Do you have any issue with opening that door wide enough to pull out the drawers? Thanks for sharing such helpful information.
Kendra Benson
Tuesday 8th of February 2022
No issues with the doors vs drawers. The hinges act in a way that gives clearance for the drawers even if you're opening them up flush against a wall or fridge.