
A Self Managed Insurance Plan is a way to build household capability in layers. The goal is simple: reduce dependency on fragile systems by covering essentials first, then improving depth, redundancy, and skill.

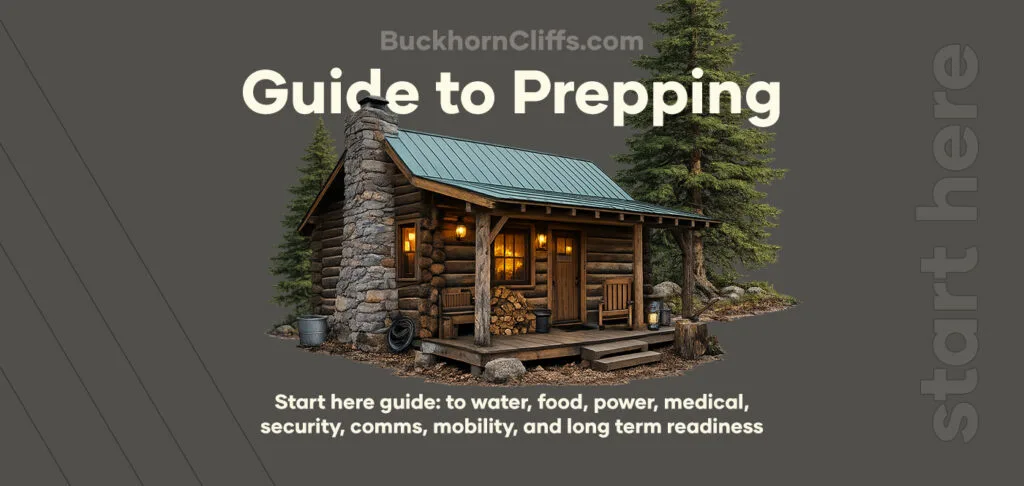
This page is the starting point. It’s designed to give you a clear order of operations, plus links to deeper guides on this website so you can keep building.
Step 1: Run a fast audit before you buy anything
Before you spend money, identify your weak points. Walk your house and property and look for dependencies you haven’t tested.
Use a simple structure:
- What fails first if the power goes out
- What breaks if water pressure drops
- What you can’t do without the internet
- What you can’t do without a store run
- What creates a safety issue if response times are long
If you want a structured checklist built for this exact process, start with the walk-around audit and use it seasonally.

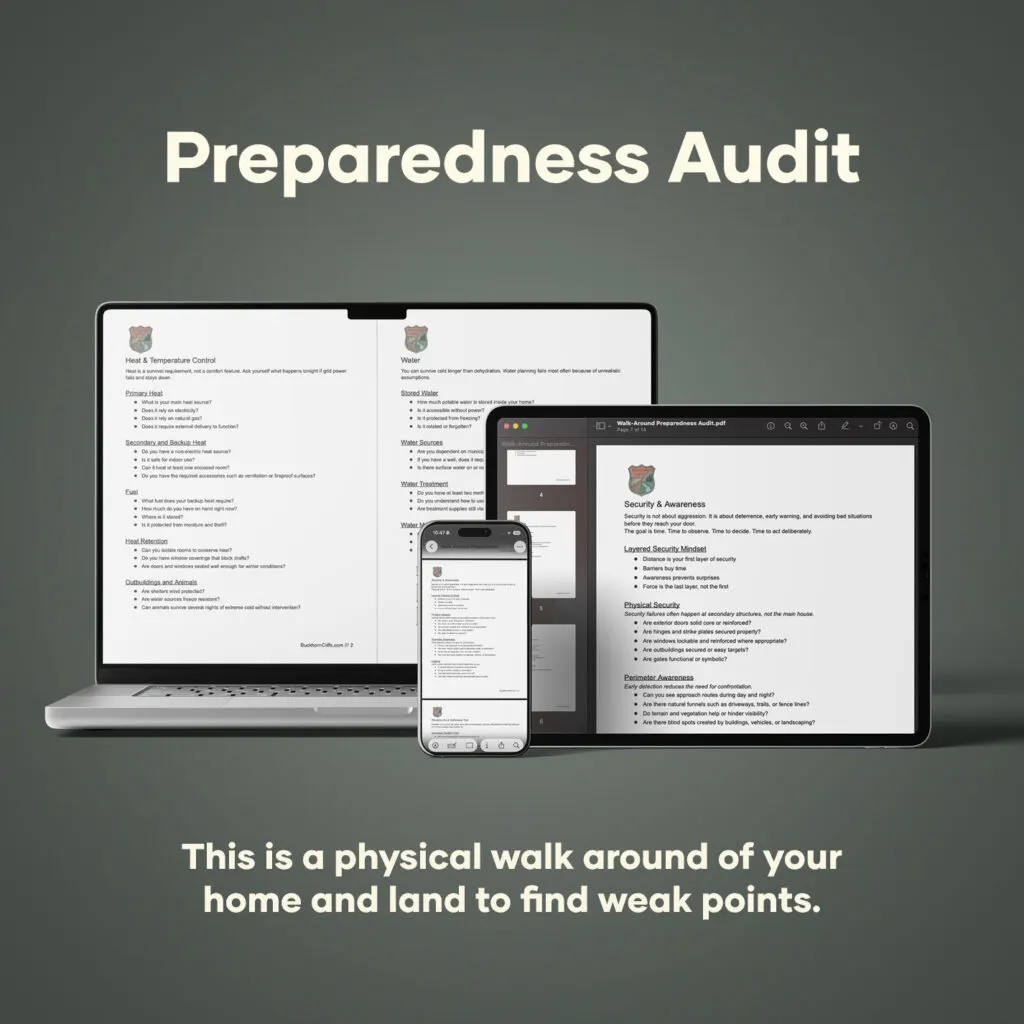
Walk-Around Preparedness Audit
A hands-on checklist that walks you through your house and land to find weak points before they matter. It covers the big failure areas (heat, water, food, power, medical, security, communication, mobility, tools, and animals) with practical questions so you can spot single points of failure and turn them into a simple fix list.
Step 2: Water
Water problems escalate fast. Your plan needs storage and purification, and it needs to work without power.
Build your water system in this order
- Storage for immediate use: Store enough water to buy time and reduce panic.
- Transport capability: You should be able to move real quantities from a local source.
- Filtration: Gravity filtration scales well and doesn’t require power.
- Chemical treatment: Chemical methods are compact, long-lasting, and work as a backup.

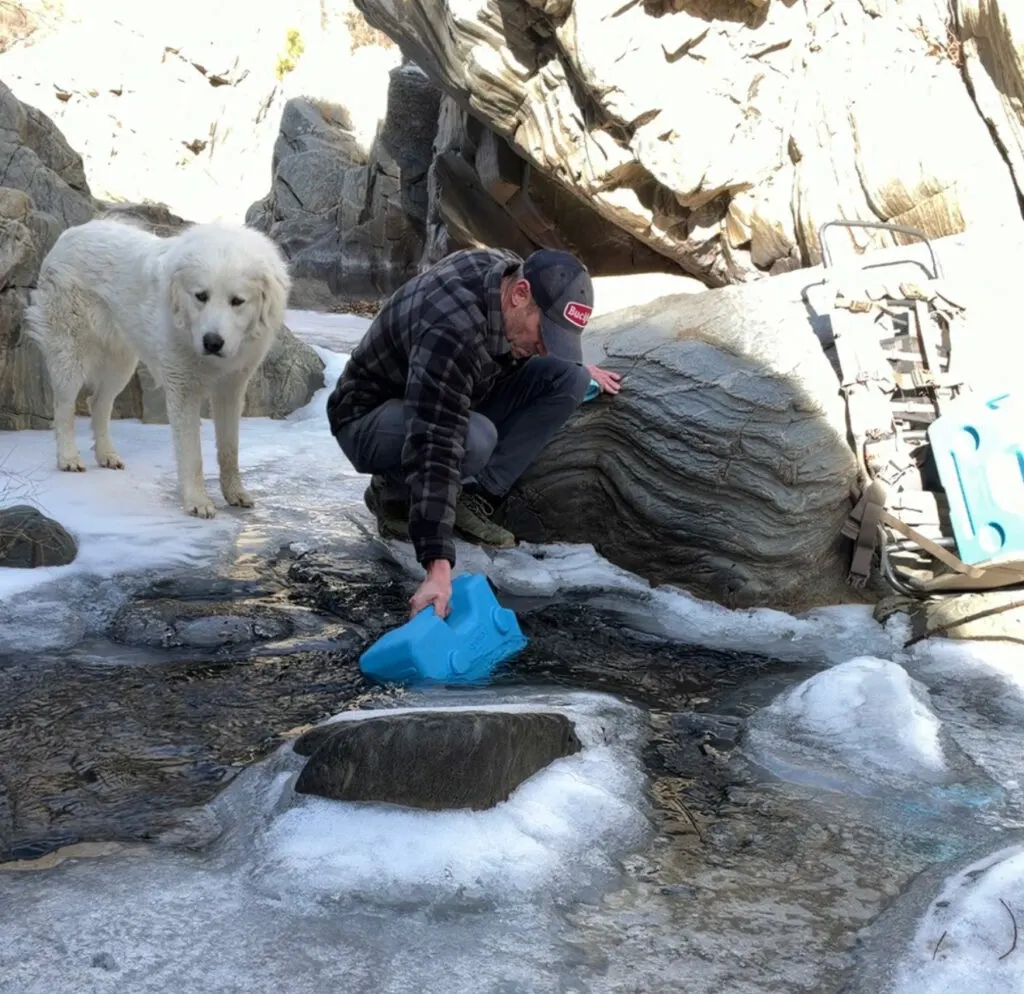
Source, Carry, and Filter Local Fresh Water
A step by step guide to getting usable water from a local source and bringing it home safely. It covers practical hauling options, container choices, and a simple home filtration setup, plus the maintenance basics that prevent biofilm and contamination over time.


Best Gravity Water Filter
A practical breakdown of why a gravity-fed stainless system is one of the most reliable home water solutions for outages and long disruptions. It explains what changed with Berkey availability, why the Boroux Legacy system is your current pick, what it can reduce, and why gravity filtration works well when power and plumbing aren’t reliable.


DIY Bleach
A quick guide to using calcium hypochlorite to make a bleach solution for long-term sanitation and emergency water treatment. Includes storage basics and safe mixing.
Tips that matter
- Water is heavy. Plan around weight and stability. Your “carry system” matters as much as the filter.
- Sanitize containers periodically. Biofilm becomes the quiet failure point of otherwise solid water storage.
- Keep a long-term sanitizer that doesn’t degrade like liquid bleach. Calcium hypochlorite is the cornerstone compound for that job.
Step 3: Food
Food preparedness is logistics and rotation. Start with what you already eat, then add long shelf-life items that hold value for years.
Build food capability in layers
- Short disruption layer: extra of normal groceries
- Medium layer: shelf stable staples you rotate
- Long layer: foods designed for multi-year storage
- Cooking layer: ability to cook with limited power and fuel
Food storage goes wrong when people skip safety and shelf life realities. The Survival Foods Guide is a good hub for storage methods, lifespan, and risk management.

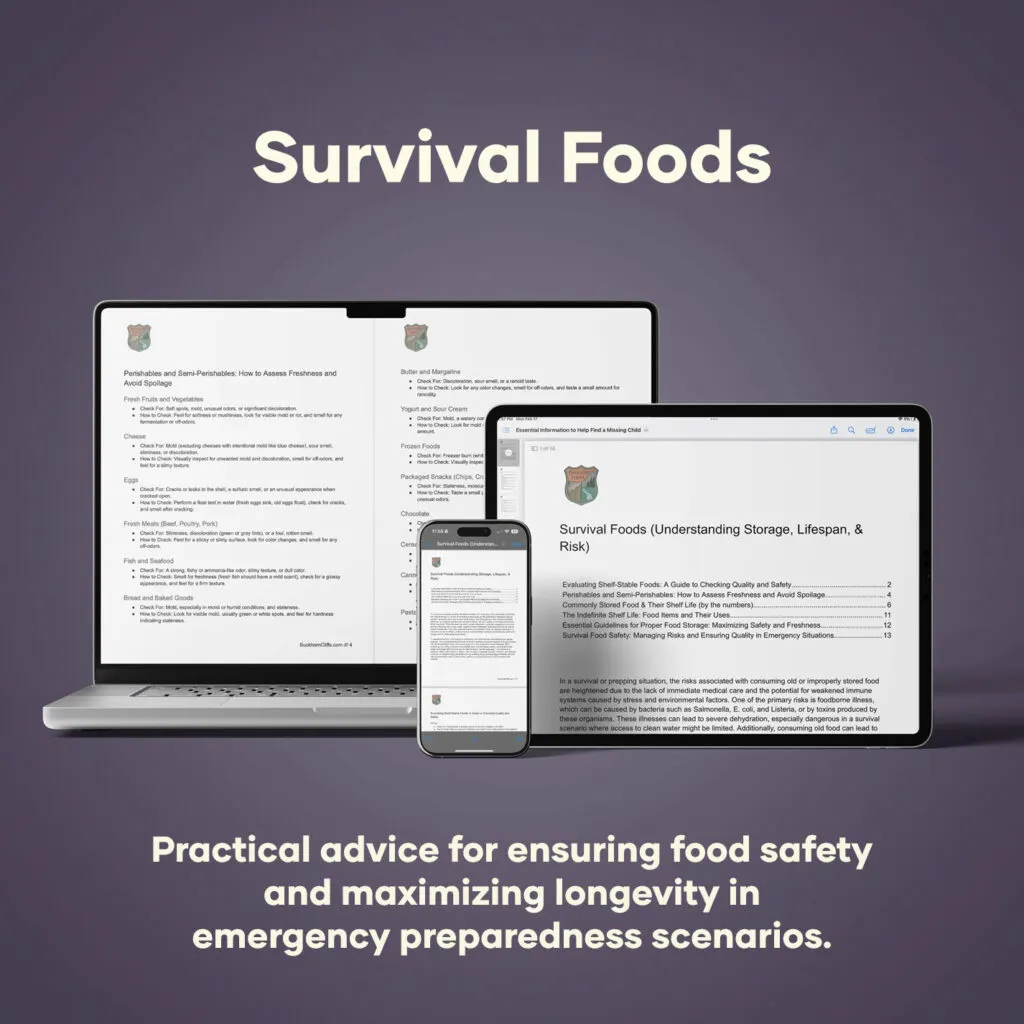
Understanding Storage, Lifespan, & Risk
A practical guide to long-term food storage with a focus on shelf life, spoilage risks, and common failure points like heat, moisture, oxygen, and packaging. Helps you choose storage methods that match your timeline and avoid problems like botulism, rancidity, and nutrient loss.
Practical tips:
- Track what your household actually consumes in 14 days. Stocking becomes obvious once you have real numbers.
- Add foods that require low water and low fuel. In disruptions, those constraints matter as much as calories.
- Store the boring basics well. Containers and environment usually matter more than brand.
Step 4: Light and power
Power loss creates compounding problems: no lights, no charging, limited cooking options, reduced comms, and less awareness.
Minimum baseline
- Multiple flashlights and headlamps
- Spare batteries or rechargeable batteries
- A way to recharge essential devices
- A plan for longer outages
Solar is the cleanest path to daily reliability because it doesn’t depend on fuel resupply. Your solar and home backup power content supports readers who want to go deeper than “a generator and some gas.”
Practical tips:
- Treat lighting like redundancy planning. One light is none. Put lights where problems happen: bedrooms, kitchen, entry points, garage.
- Identify your critical loads. Charging phones and running a freezer are different problems and require different planning.
Step 5: Medical
Medical preparedness includes supplies, documentation, and the ability to act calmly under stress.
What to cover first
- Bleeding control and wound care
- Infection prevention
- Pain, fever, allergy, and GI support
- Prescription medications and continuity
- Storage methods that protect meds long term

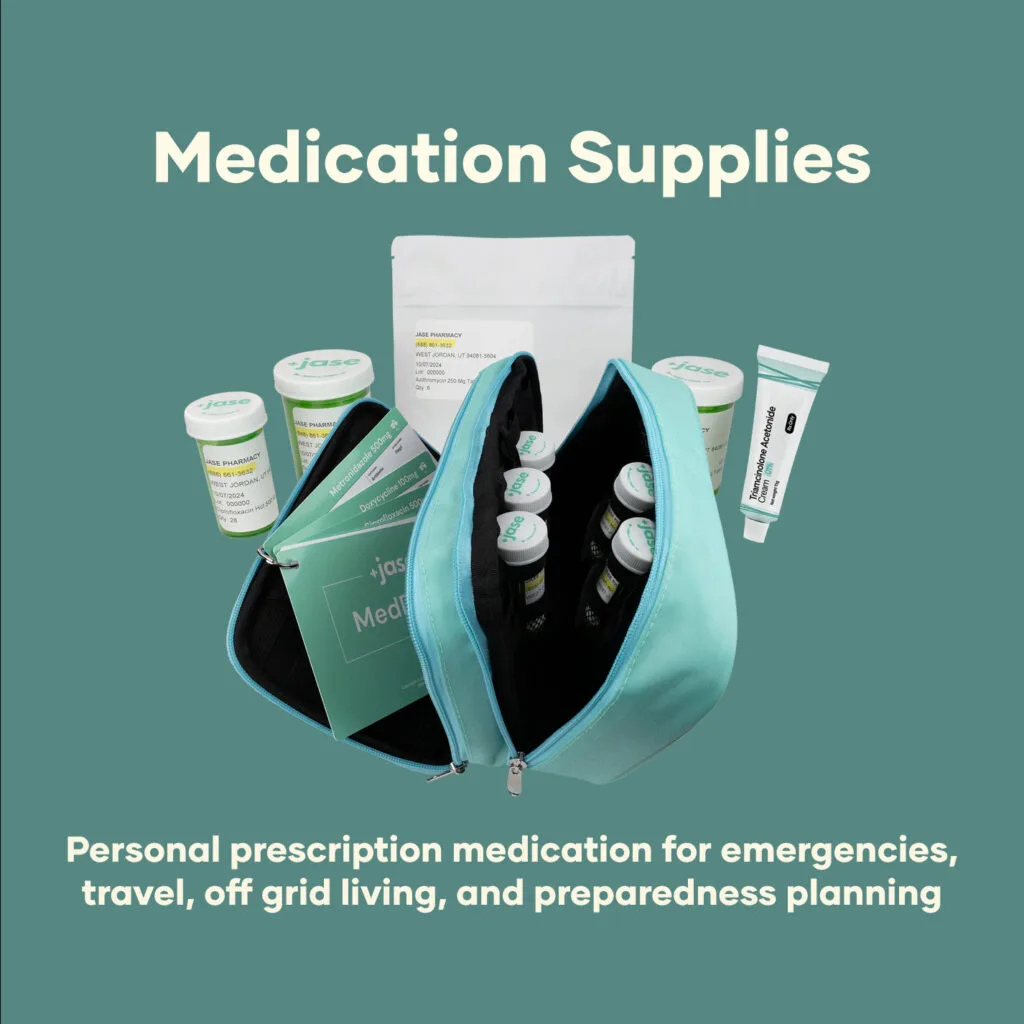
Medication Supplies
A practical overview of how to legally order preparedness-focused prescription kits online, including physician review and home delivery. It explains what’s available (emergency antibiotic kits, parasite kit, dental kit, kids kit, and a 12-month backup supply of your current prescriptions), plus common add-on meds you can select based on your needs.

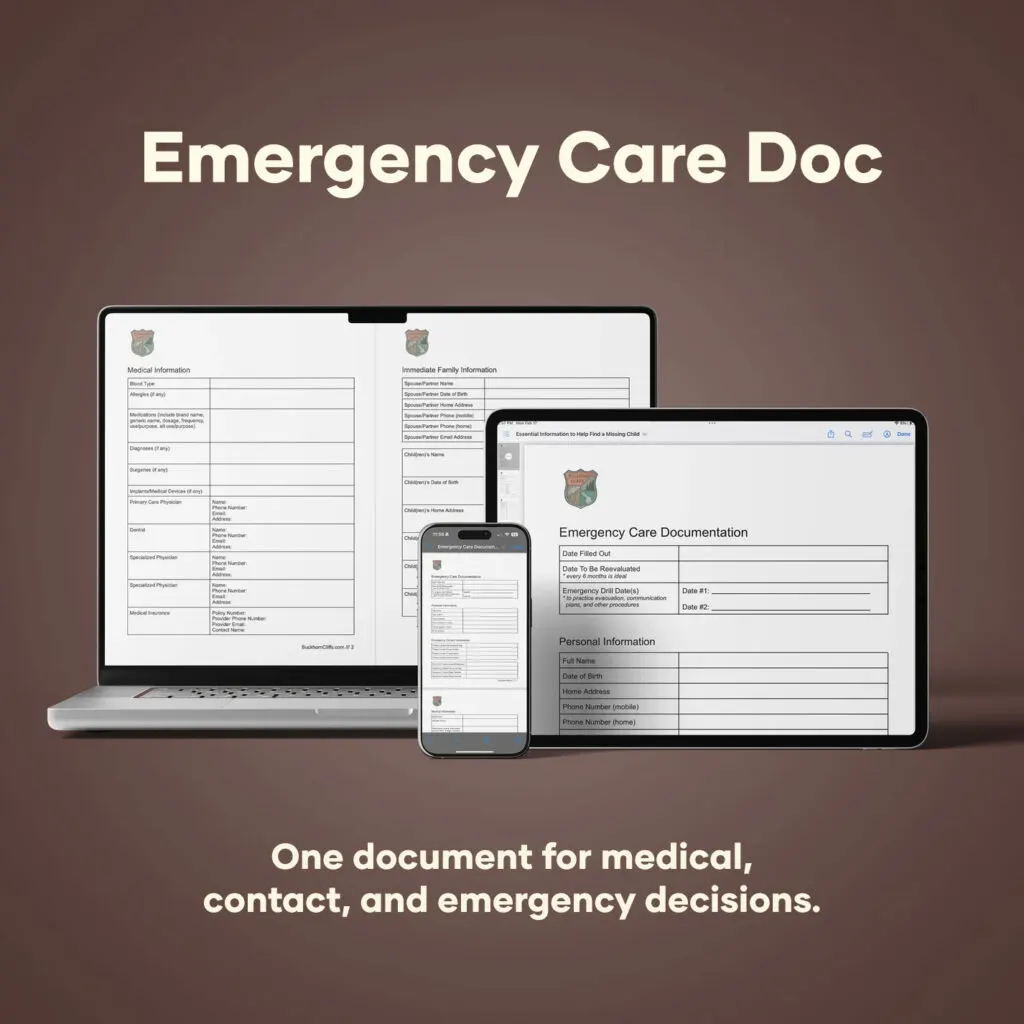
Emergency Care Documentation
A printable emergency documentation system that organizes critical information in one place, including medical details, emergency contacts, communication plans, evacuation notes, and other essentials you don’t want to rebuild from memory during a crisis. It’s designed to be filled out, updated, and stored where it’s accessible when time matters.
Practical tips:
- Build a “house kit” and a “mobile kit.” They serve different purposes.
- Write down med dosing guidance and store it with the kit (the Jase Case has med deck cards that make that very easy). Under stress, memory fails.
Step 6: Firearms and personal defense
Include firearms in your preparedness plan and treat them as a system.
The practical approach
- Choose reliable firearms that are effective for the purpose
- Train enough to be competent and consistent
- Store securely with reasonable access
- Maintain an ammunition baseline appropriate to your training and realistic scenarios
- Integrate defense into home layout, lighting, and communication
Practical tips:
- Training beats gear upgrades. A simple, reliable setup used consistently matters more than variety.
- Home defense planning includes physical hardening, visibility, and practiced movement at night.
Step 7: Chemical compounds
This is one of the highest leverage categories in long-term preparedness because stable compounds solve multiple problems across water, hygiene, cleaning, preservation, and pest control.
How to build a chemical compounds baseline
Start with compounds that are:
- Stable in storage
- Useful across many tasks
- Simple to apply safely
- Replace products that degrade or are hard to resupply
I will be releasing my chemical compounds for preppers book soon. More details to come!
Practical tips:
- Store dry, sealed, labeled, and separated from moisture. Most compound failures are storage failures.
- Keep a written quick-reference for dilution and use cases in the container, not in your phone notes.
Step 8: Communication and information
Build a communication plan that still works when cell service is unreliable, congested, or down. The goal is consistent coordination, clear check-in rules, and multiple ways to send and receive information.
What to set up first
1) A written communication plan
Put this on paper and store copies in your home kit, vehicle, and go-bag.
Include:
- Names and phone numbers for family, neighbors, and key contacts
- Addresses for meet-up locations
- A simple check-in schedule
- Clear fallback steps if someone can’t be reached
2) One out-of-area contact
Choose one person outside your region that everyone uses as the first call or text. Local disruptions often make local routing unreliable, while out-of-area routing still works.
Emergency Care Documentation
A printable emergency documentation system that organizes critical information in one place, including medical details, emergency contacts, communication plans, evacuation notes, and other essentials you don’t want to rebuild from memory during a crisis. It’s designed to be filled out, updated, and stored where it’s accessible when time matters.
3) Local comms that don’t rely on cell towers
Two-way radios provide short-to-moderate distance communication without internet or cellular infrastructure. Terrain and buildings control range, so test in the places you actually move around.
Practical setup:
- Standardize on one channel plan for your household
- Label radios and keep a simple quick-reference card with them
- Keep spare batteries or a battery pack dedicated to radios


How to Communicate with NO Cell Service or Internet
When there’s no cell service or internet, use two way radios for direct radio to radio communication and test them where you actually travel. Keep it standardized with a written card that lists your default channel, backup channel, and basic settings stored with the radios, and use short, clear transmissions. If you need more range, a repeater can extend coverage, but document the channel and tone details and confirm it works ahead of time.
Add a cellular booster layer when you have weak service
If you have some signal outside but it drops indoors or you’re stuck at one bar, a cellular booster can make calls and texts more reliable by pulling in weak signal and rebroadcasting it.


A fixed booster can improve indoor usability at a remote property when there’s weak outdoor signal. It’s a set-it-up-once tool that supports routine use and emergencies.

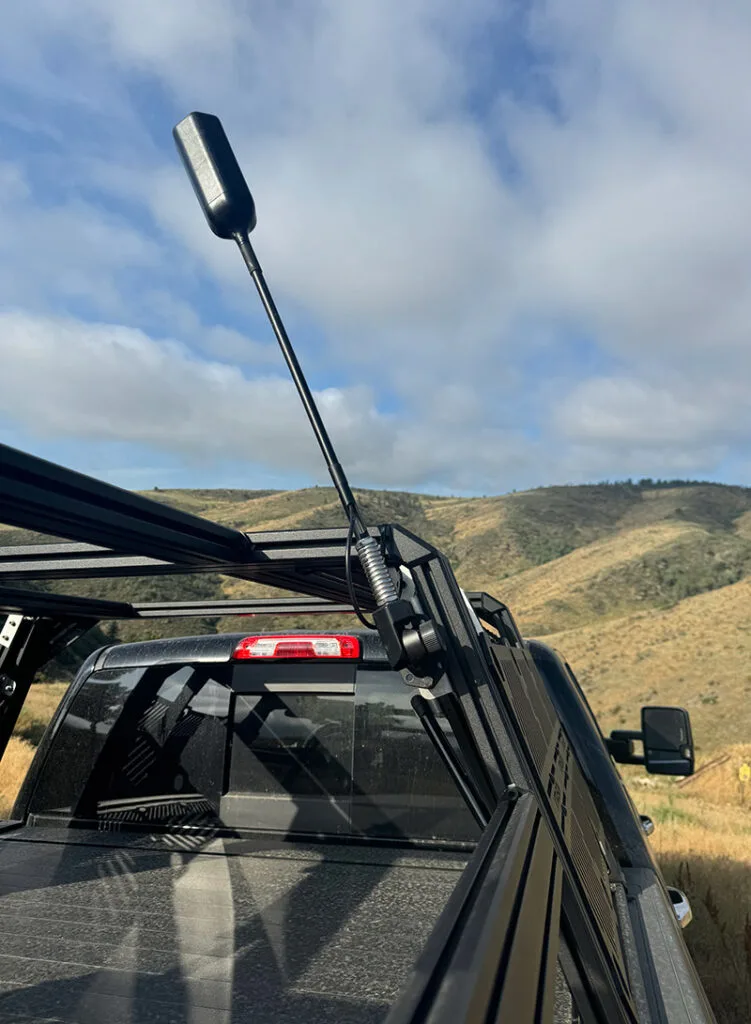
Vehicle booster for travel and overlanding
A truck-mounted booster supports mobility and travel scenarios where you’re moving through fringe coverage. Your test notes show it can turn a low-signal area into usable calls, texts, and data without needing a new carrier plan.
Practical tips:
- Test signal strength before and after using your phone’s field test mode so you can verify improvement
- Mount antennas cleanly and keep cables protected because physical routing is usually where installs fail over time
- Treat boosters as a “make weak signal usable” tool, not a guarantee in true dead zones
Add a portable internet layer when you need online access
Satellite internet adds a separate path for messaging, maps, updates, and coordination when cellular networks are down or you’re outside coverage.

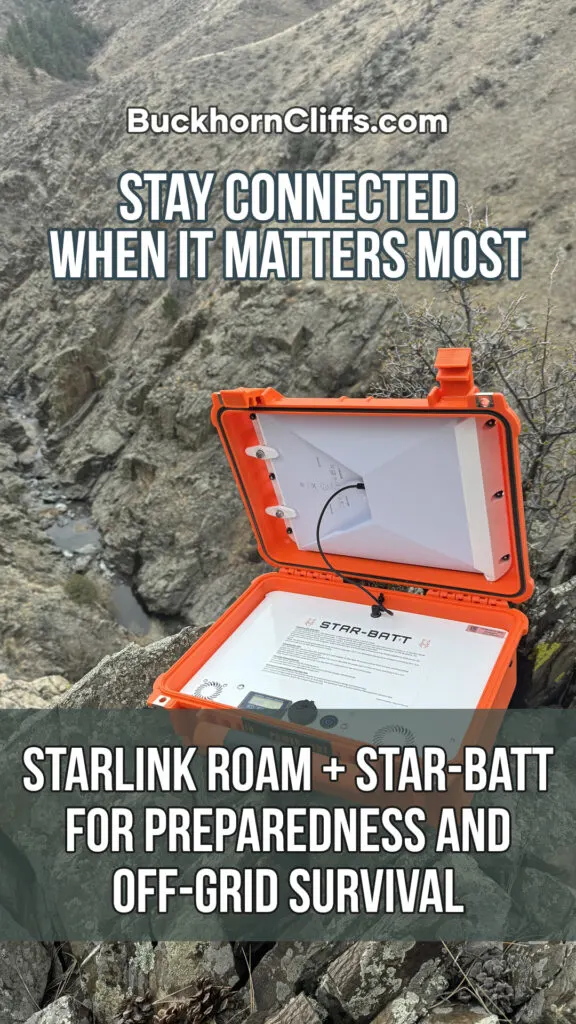
A portable satellite internet setup can keep messaging, maps, and coordination working when cellular networks are down or you’re outside coverage. It needs a clear view of the sky and a realistic power plan, including a battery solution and a way to recharge like solar, so it stays usable beyond a short runtime.
Don’t let power be the weak point
Communication fails when devices die. Keep these inside your power kit:
- Charging cables for phones and radios
- A battery bank sized for your devices
- A recharge method that doesn’t depend on outlets, solar is the cleanest option for daily reliability
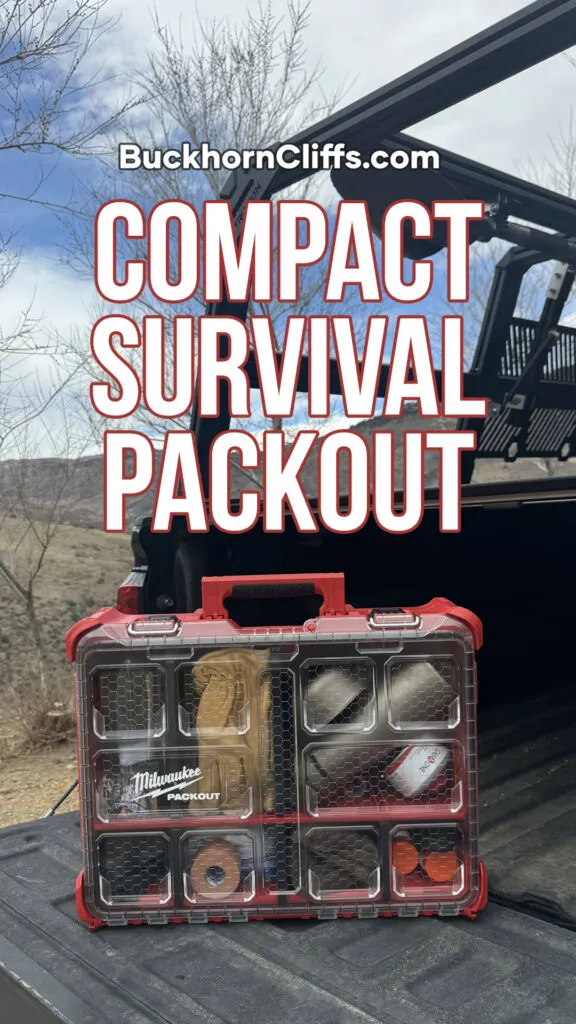
Step 9: Bug-out, everyday carry, quick-find storage
Most people don’t need a fantasy loadout. They need a practical ability to move essentials, handle short disruptions, and stay functional away from home.

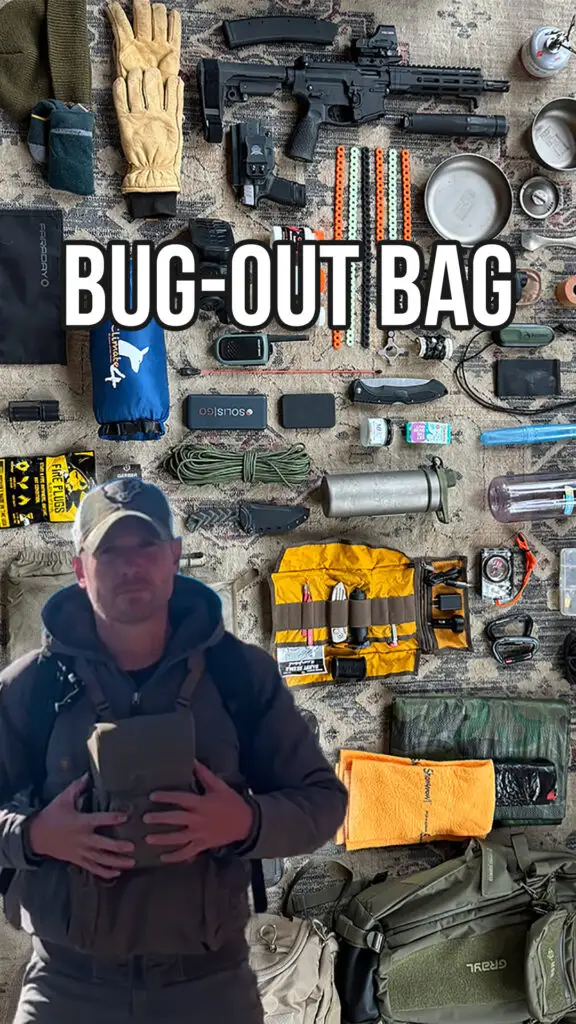
Building the Ultimate Bug-Out Bag: Practical Gear That Actually Works
A bug-out bag is a prepacked mobility kit built to keep you functional for the first critical window away from home, with water, food, layers, light, medical, fire, tools, and basic navigation. The goal is speed and reliability, so pack around realistic local scenarios and keep the bag tested, staged, and updated instead of overloaded.

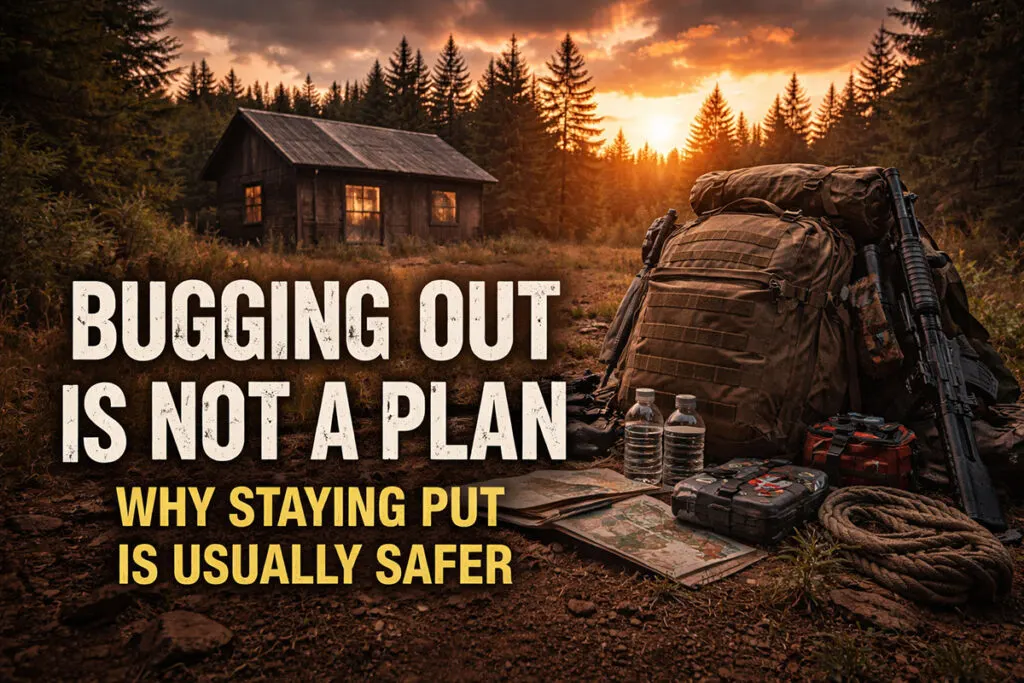
Leaving early is often treated like the default plan, but it can increase risk by putting you into traffic, uncertainty, and resource competition. This guide explains why staying put is usually safer when you’re stocked and prepared, and it lays out the factors that should actually trigger an evacuation decision, plus how to prepare so you’re not forced into a bad move.

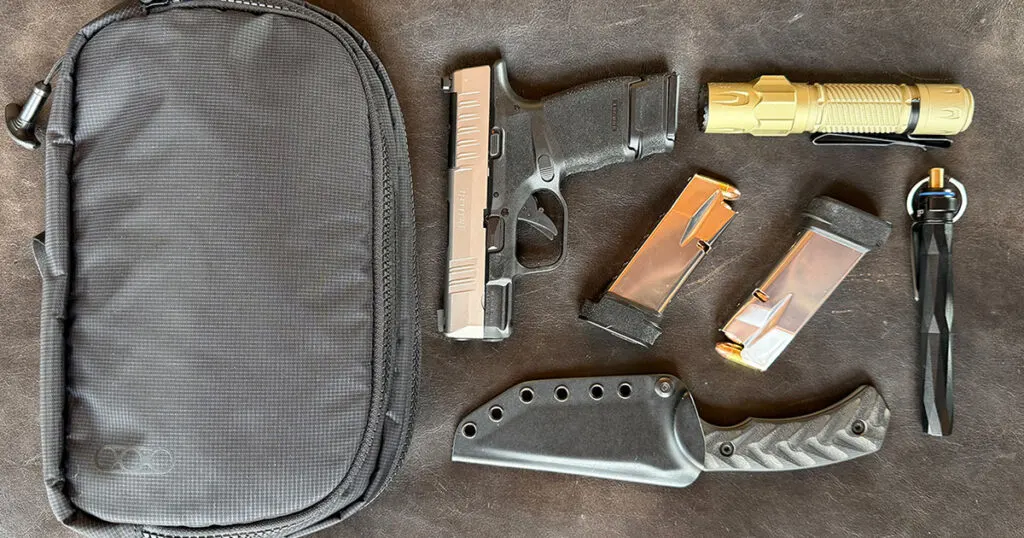
An everyday carry sling is a compact grab-and-go kit that covers tactical (violence) problems.

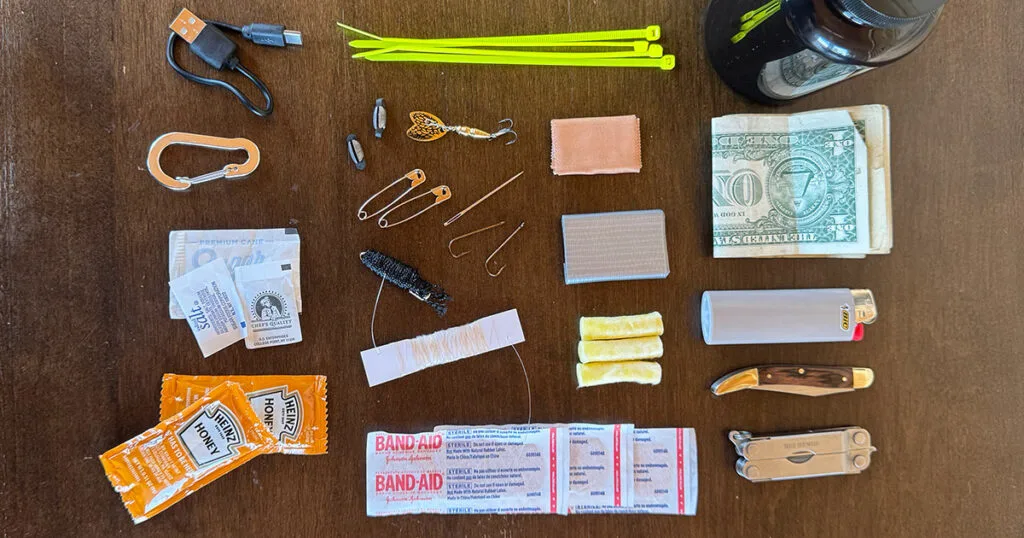
This pill bottle kit is a small, sealed micro-kit that keeps critical items protected and always available, including fire-starting, a cutting tool, basic cordage, and compact first aid. It’s built for redundancy and portability, so you can stash it in a bag, vehicle, or pocket without taking up space.

Grab-and-Go Preparedness Kit
A grab-and-go preparedness kit is a staged, ready-to-move setup for short-notice disruptions, built around the items you’ll want in the first hour: water and purification, light, medical basics, power and charging, key documents, cash, and a few core tools. It’s organized so you can grab it fast without digging, and it’s designed to support either sheltering in place or leaving if you have a real trigger to evacuate. The main advantage is speed and reliability because packing under stress leads to missed essentials.
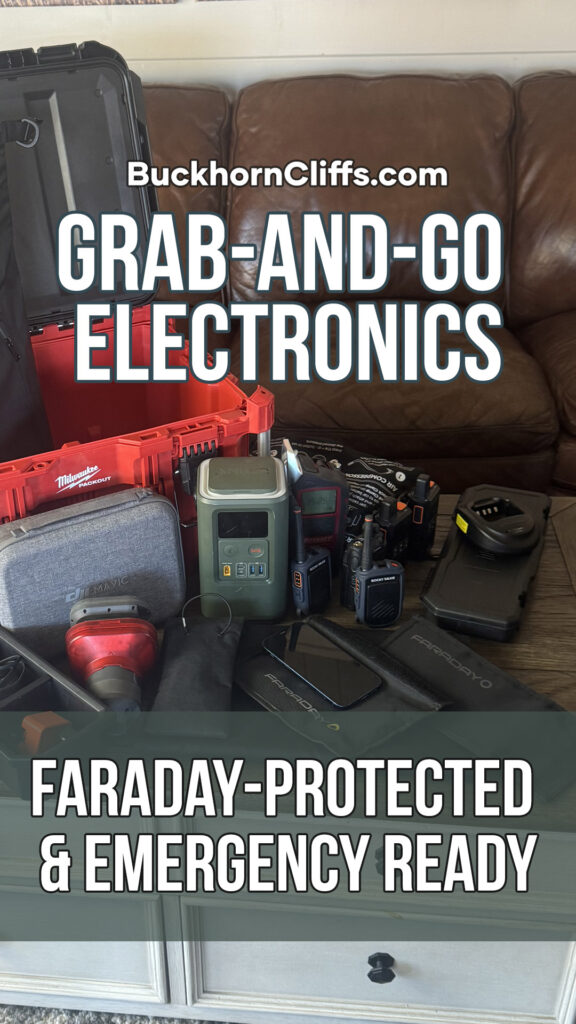
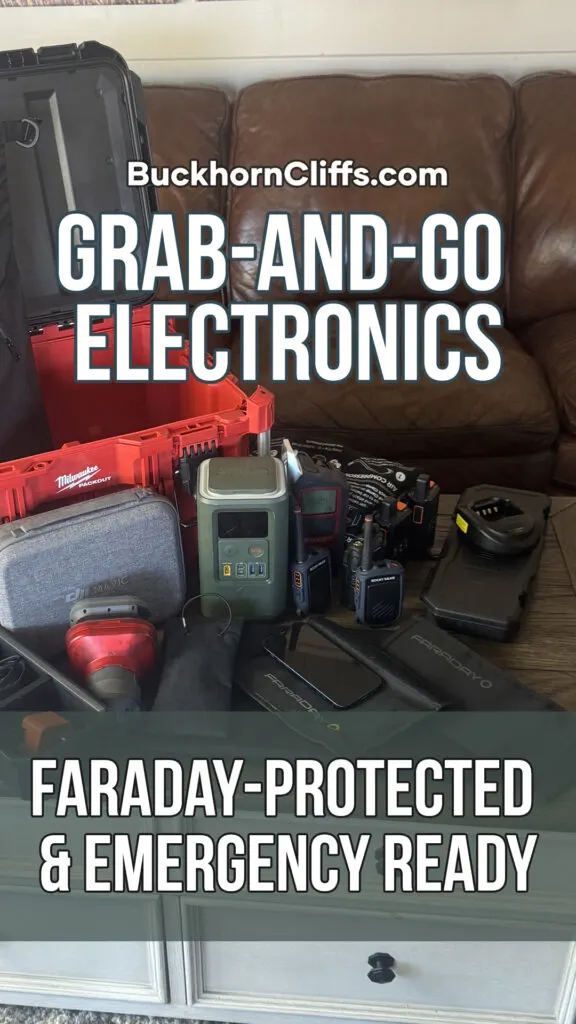
Grab-and-Go Electronics: Faraday-Protected and Emergency Ready
A grab-and-go electronics kit keeps critical devices staged, protected, and ready to deploy, including power banks, charging cables, lights, radios, and backup devices you’d rather not lose to damage, moisture, or rough handling. This guide covers how to organize and protect that electronics layer so you can maintain communication, navigation, and power in the first hours of a disruption.
Practical tips:
- Build around scenarios you actually face: vehicle breakdown, evacuation due to fire, grid outage, travel disruption.
- Pack for time and distance. Those two variables dictate everything.
A simple timeline for new preppers
If you want a clean order of execution:
Day 1 to Day 7
- Run the audit and fix obvious gaps
- Establish water storage and at least one purification method
- Establish lighting and power redundancy
Week 2 to Week 4
- Expand food buffer and improve storage approach
- Build a basic medical kit and documentation plan
- Start chemical compound basics, starting with sanitation
Month 2 and beyond
- Add power depth, including solar
- Train skills: water, medical, navigation, home drills
- Expand comms and mobility systems
A Self Managed Insurance Plan is a practical way to build household readiness without getting overwhelmed. Start by removing the most fragile dependencies first: water, food, light, power, and medical basics. Once those are covered, add layers that extend capability, including communication, mobility, and a reliable way to protect yourself and the people in your care.
The goal is a system that keeps working when conditions change. That means redundancy, simple equipment that’s easy to maintain, and written plans that reduce decision-making under stress. It also means practicing the basics, such as lights-out drills, water handling, radio use, and cooking without relying on the grid.
Use the links throughout this guide to go deeper on each category and build your plan one section at a time. If you follow the order on this page and keep improving the weak points you discover, you’ll end up with a setup that’s realistic, sustainable, and built around how you actually live.
Pin it

Michaela
Wednesday 3rd of September 2025
Díky
Troy
Tuesday 20th of August 2024
This is a really great overall foundation to build from. As we have always been told, knowledge is power and in this give a great starting point for everyone from newer preppers to those who have been working on it for a while. Thank you for providing this
Rob Benson
Tuesday 20th of August 2024
You're welcome! Thanks for your kindness.
Ben T
Wednesday 3rd of April 2024
Just getting into the prepper space, thanks for the tips.
Rob Benson
Friday 5th of April 2024
Welcome!